OWNERSHIP
Owner’s guide
What owners actually add to their Airstreams, and the service calendar that keeps them road-ready — every recommendation and interval traced to a primary source.
How the community signal is judged
The signal reflects only sources we opened and read — two long owner mod threads on Airforums, the Airstream Club's official carry list, and a first-person owner build. It's a read of owner sentiment, not a vote count, and no source we couldn't reach is implied.
No upgrades match those filters.
Power: lithium, solar & inverters
6The single most-recommended upgrade path. Airstream sells solar and lithium from the factory, sized to each model line (table below) — and going aftermarket unlocks far bigger off-grid builds. Either way, lithium + solar + an inverter is what turns a hookup-only trailer into a boondocking one.
Airstream's factory solar & lithium program, by model
Airstream matches solar wattage and lithium capacity to each model line. Two rules to know: factory lithium is only sold bundled with the solar package, and on Basecamp it requires the 360W solar tier. Everything below is from Airstream's own feature pages.
| Model line | Rooftop solar | Lithium house battery | How it's sold |
|---|---|---|---|
| Trade Wind | 600W — standard | 810Ah heated — standard | Standard off-grid build; 3,000W inverter, every outlet inverted |
| Classic | 300W — standard | 200Ah / 2.5 kWh heated — standard | Standard |
| Pottery Barn Special Edition | 300W — standard | 200Ah / 2.5 kWh heated — standard | Standard |
| Globetrotter · International · Flying Cloud | 300W — optional ($2,600) | 200Ah / 2.5 kWh heated — optional | Lithium only with the solar package |
| Basecamp 20 · 20X | 300W — optional (360W with lithium) | 200Ah — optional | Lithium requires the 360W solar tier |
| Caravel 20FB/22FB · Bambi 20FB/22FB · Basecamp 16/16X | 200W — optional (360W on Basecamp w/ lithium) | 200Ah — optional | Lithium with the solar package |
| Caravel 16RB/19CB · Bambi 16RB/19CB | 100W — optional | 200Ah — optional | Lithium with the solar package |
The 10.3/17.2 kWh “Advanced Power System” is a Model-Year-2026 motorhome platform (Atlas, Interstate) — it is not offered on travel trailers, so it's deliberately left off this list.
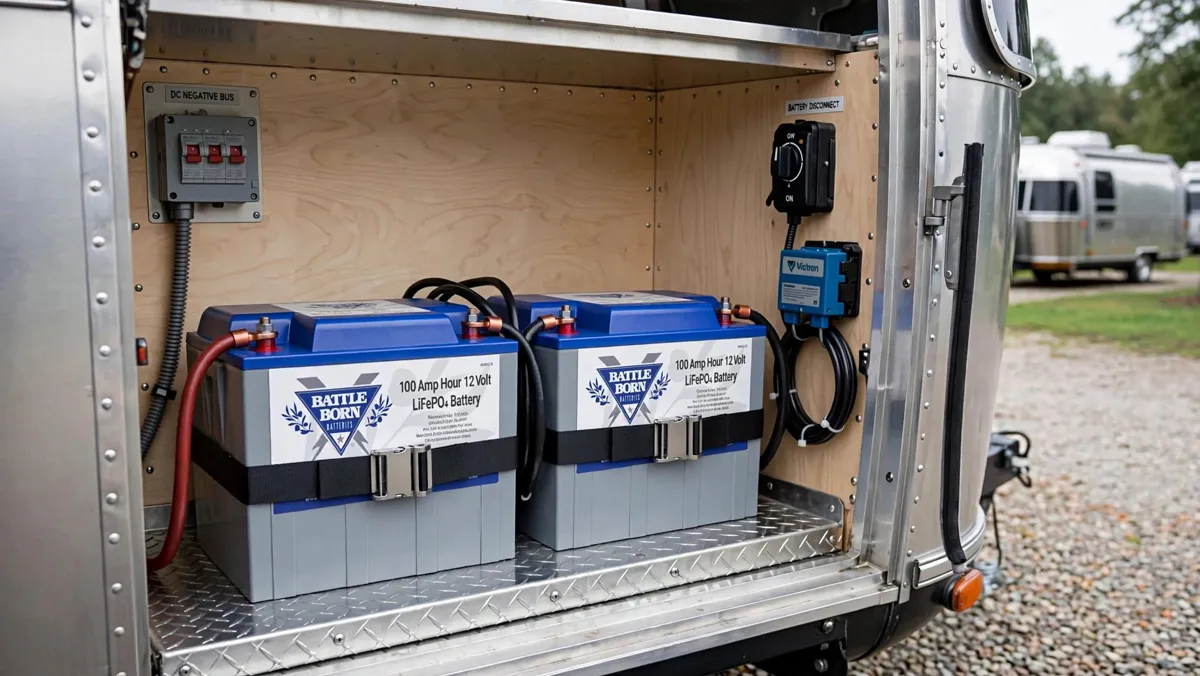
Lithium (LiFePO4) house batteries
Factory or aftermarketFactory 200–810Ah · aftermarket $150–949 per 100Ah
2–3× the usable capacity of lead-acid (100% depth of discharge vs ~50%), far lighter, ~10-year life, and they charge faster. Airstream now sells lithium from the factory as a heated 200Ah (~2.5 kWh) bank — standard on Classic and Pottery Barn, optional on Globetrotter, International, Flying Cloud, Caravel, Bambi and Basecamp — but only bundled with the solar package. The Trade Wind goes furthest with a standard 810Ah heated bank.
What owners pick Airstream's own factory cells are Battle Born — the Trade Wind runs three heated Battle Born units for its 810Ah bank. Aftermarket, Battle Born 100Ah (~$799, 10-yr warranty) is the default and the Epoch Elite V2T (up to 460Ah, built-in Class-T fuse, internal heater) is the installer high-end. Budget drop-ins (Power Queen, LiTime) run ~$150–250 per 100Ah.
Why this signal Named by multiple owners in the top-mods thread, has its own dedicated multi-owner conversion thread, and led the Outside owner's build.
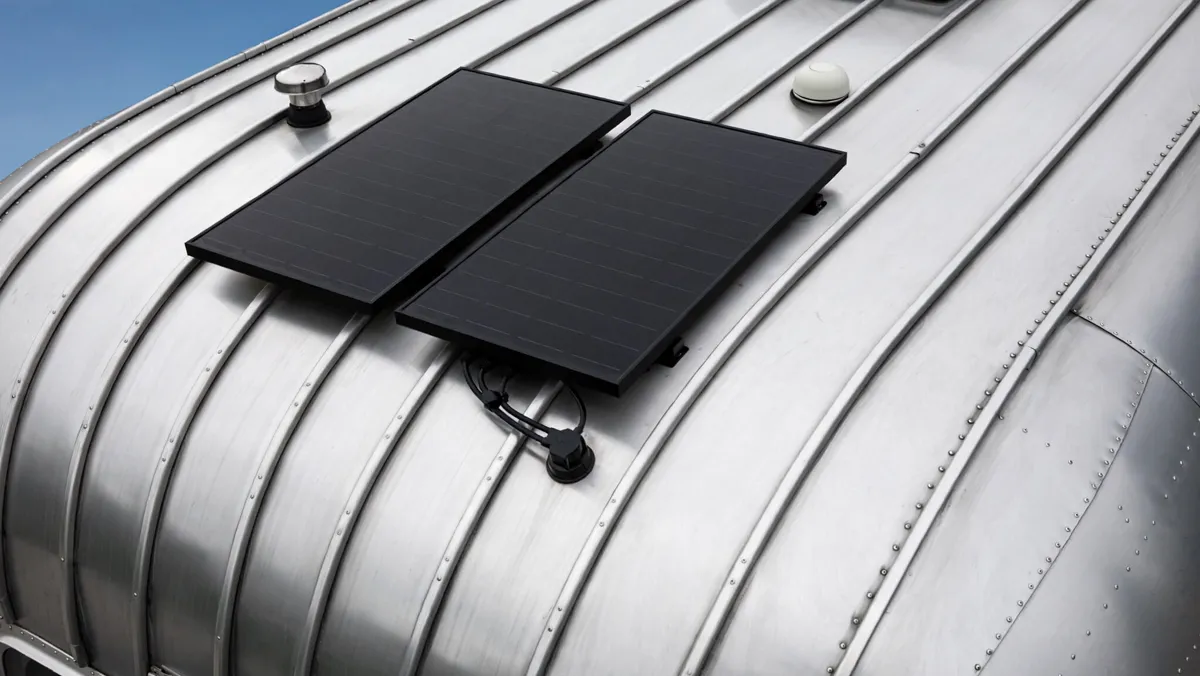
Rooftop solar (factory 100–600W, or bigger aftermarket)
Factory or aftermarketFactory 300W $2,600 · aftermarket $500–3,000+
Keeps the battery bank topped up off-grid so you can stay out for days without a generator. Airstream matches factory solar to the model: 600W standard on Trade Wind, 300W on Classic, 300W optional ($2,600) on Globetrotter/International/Flying Cloud, and 100–200W on the smaller Caravel, Bambi and Basecamp — with a 360W tier on Basecamp when you add lithium. See the table above for the full per-model breakdown.
What owners pick The factory 300W package (three 100W panels + controller + interior battery monitor) is the easy box-tick. Owners going bigger fit 600–1000W aftermarket for serious boondocking; some prefer a portable/ground panel to chase the sun in shaded sites, with 'nowhere to store them' the recurring complaint. Many run both.
Why this signal Owners run 510–600W roof setups; the rooftop-vs-portable tradeoff is a genuine, unsettled debate in the threads, not a solved question.
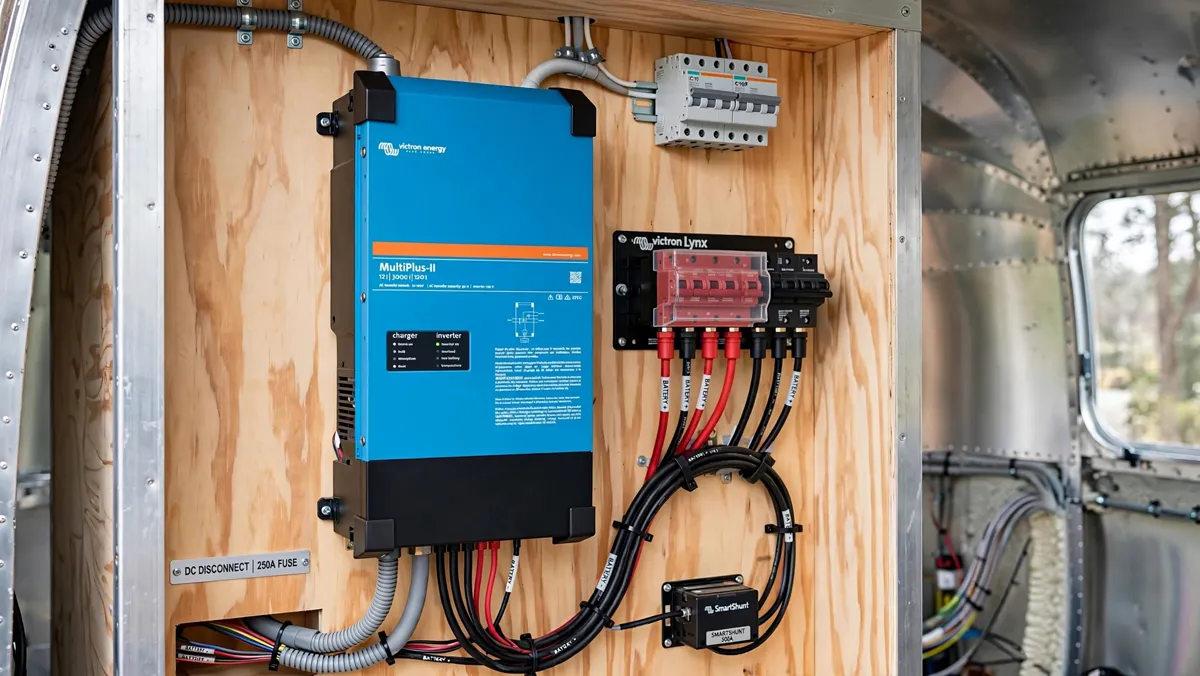
Inverter / inverter-charger (2000–3000W)
Factory or aftermarket$1,000–1,400 (Victron 3000VA)
Runs household AC outlets — coffee maker, microwave, TV — off the battery bank when you're not plugged in. A pure-sine 2000–3000W unit covers most loads; pair with lithium and solar for a complete off-grid system. The Trade Wind already ships a 3,000W inverter standard with every outlet inverted; on other trailers it's an aftermarket add.
What owners pick Victron MultiPlus / MultiPlus-II 12V 3000VA (US 50A model ~$1,088–1,375) is the near-universal installer choice, usually with a Victron Lynx distributor, Orion XS DC-DC charger and a Cerbo GX touchscreen for monitoring.
Why this signal Loved by the heavier-build crowd; the Outside owner deliberately skipped one in favor of a portable power station, so it's not universal for casual campers.
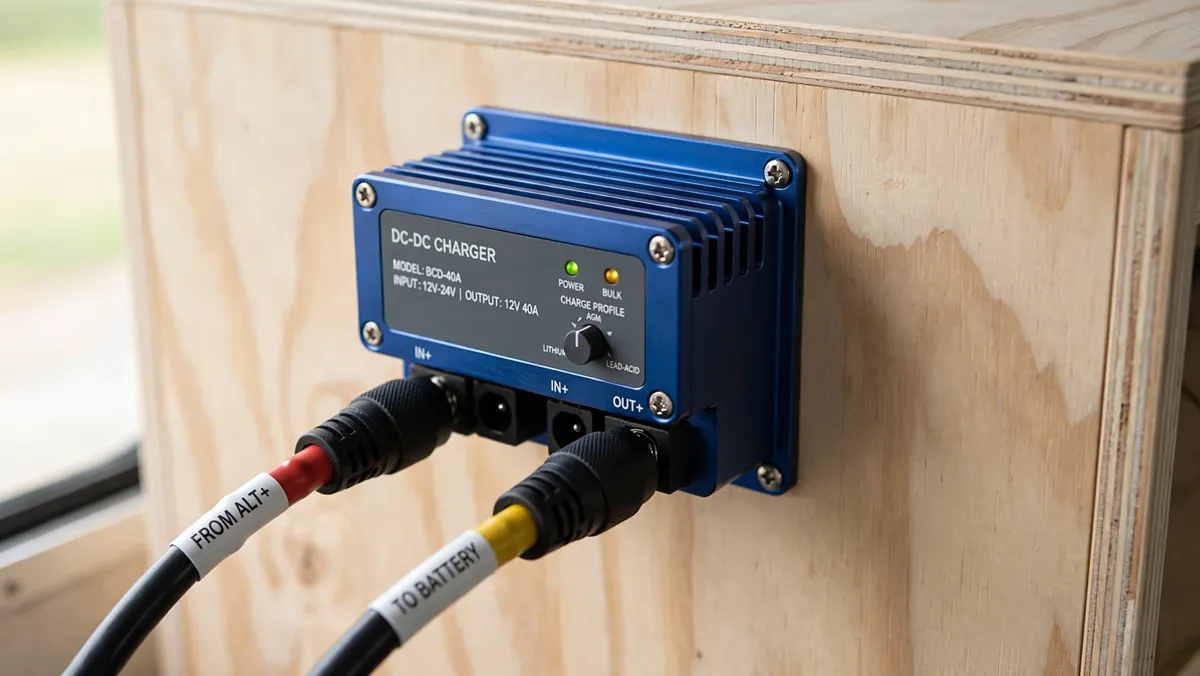
DC-DC charger (alternator charging)
Aftermarket$150–350
Lets the tow vehicle's alternator safely charge a lithium bank while you drive, without overloading a modern 'smart' alternator or blowing the 7-pin fuse. Owners call it best practice once you switch to lithium because the factory converter alone charges slowly.
What owners pick Victron Orion XS 1400 is the current favorite in installer builds.
Why this signal Almost always discussed as a required companion to a lithium swap, not a standalone headline mod.
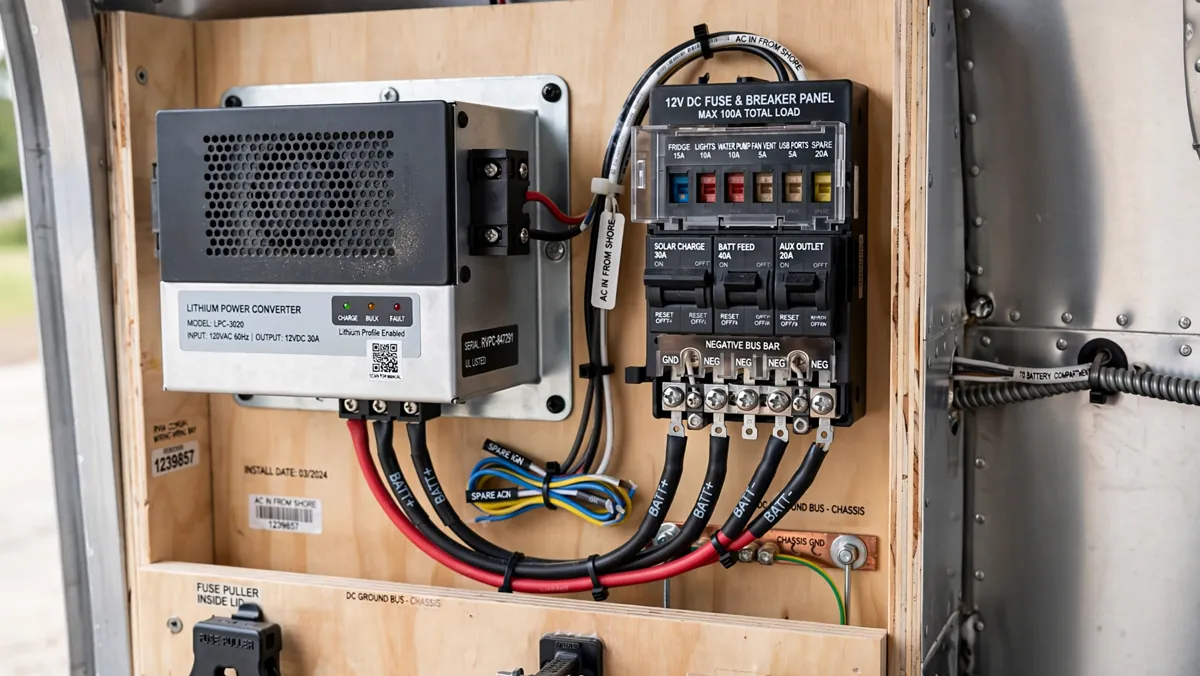
Lithium-profile converter / charger
Aftermarket$200–350
The factory WFCO/converter is tuned for lead-acid and stops short of fully charging lithium. Swapping to a lithium-profile converter (or a multi-stage charger) lets shore power and the generator actually top the bank to 100%. A standard companion to any lithium conversion.
What owners pick Progressive Dynamics and WFCO lithium-profile converters are the common drop-in replacements; bigger builds fold this into the Victron inverter/charger instead.
Why this signal Owners stress it constantly as part of any lithium swap — the stock converter won't fully charge LiFePO4.
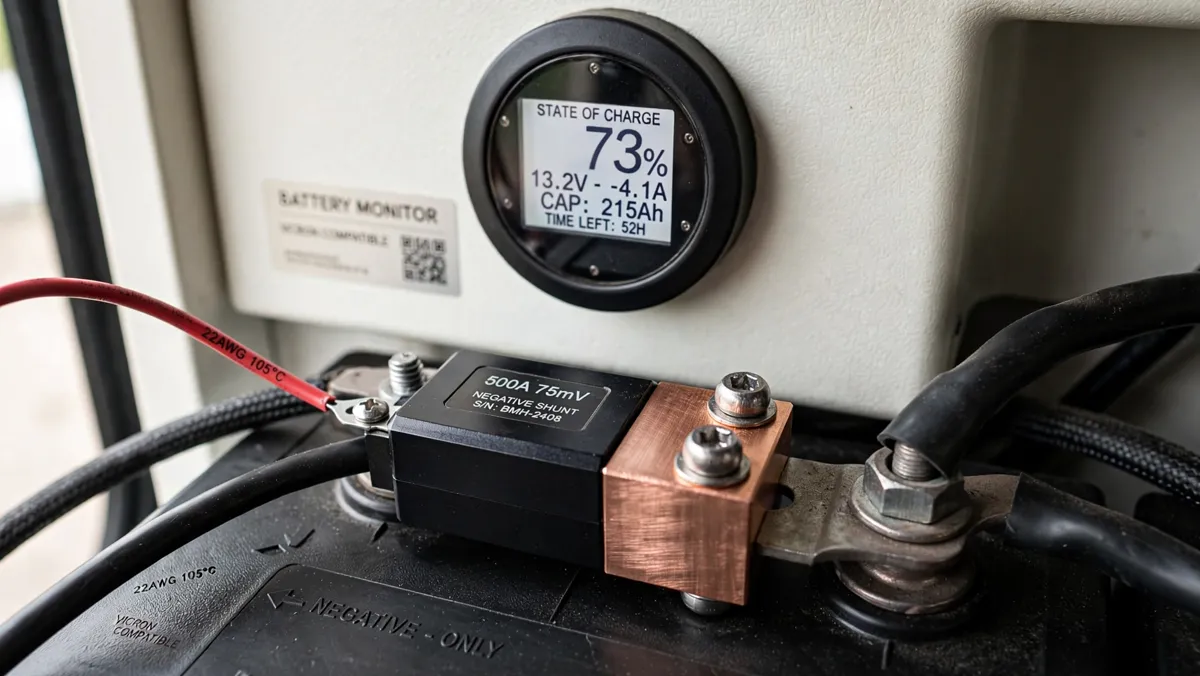
Battery monitor / shunt
Aftermarket$80–130 (Victron SmartShunt)
Counts amps in and out to give a true state-of-charge reading instead of a guesswork voltage gauge — essential with lithium, whose flat voltage curve hides how full the bank really is. Reads on your phone over Bluetooth.
What owners pick Victron SmartShunt 500A (~$80–130) is the default; the Victron BMV-712 adds a dedicated display. Pairs with the rest of a Victron system.
Why this signal Repeatedly cited as part of any lithium/solar build so you can trust your state-of-charge.
A/C, airflow & climate
3Making the air conditioner run off batteries or a small generator, moving air without it, and keeping the trailer comfortable in heat and cold.
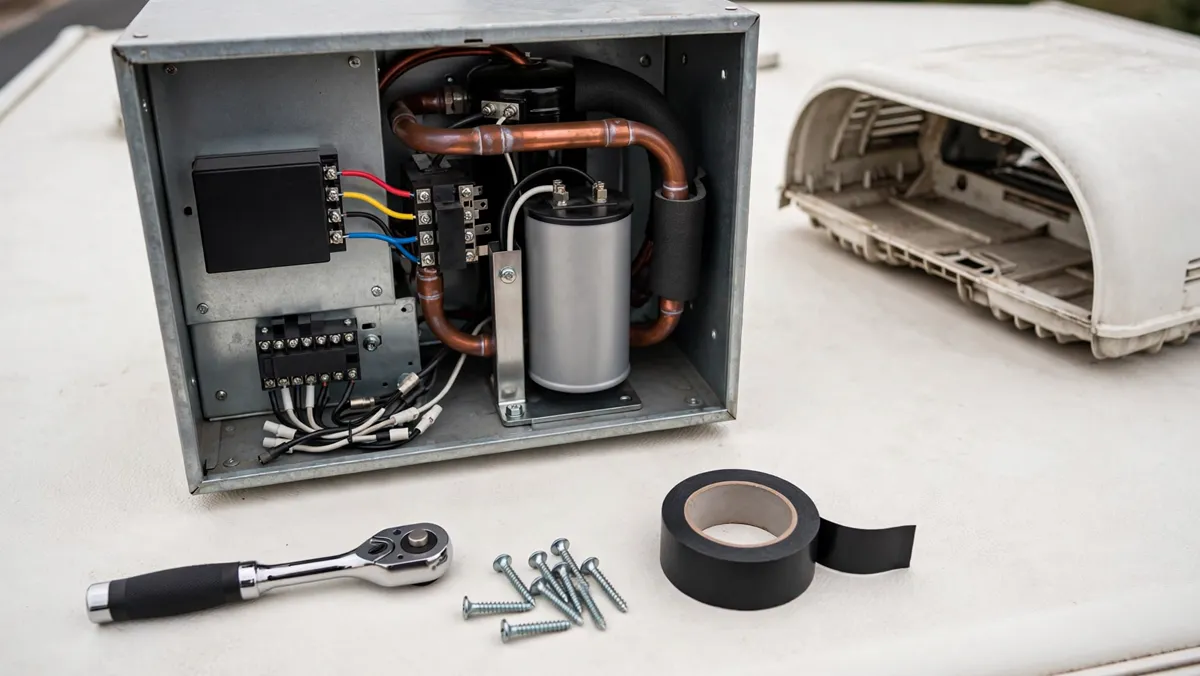
Soft start for the A/C
Aftermarket$270–350 installed part
A rooftop A/C draws 60–100+ amps the instant the compressor kicks on, which trips breakers and stalls inverters. A soft start cuts that surge by ~70% (down to ~25–30A), so you can run the A/C off lithium + inverter, or start it on a small 2,000W generator or a 15/20A household plug. Owners call this near-mandatory if you want A/C off-grid.
What owners pick Micro-Air EasyStart 364 and SoftStartRV are the two enthusiast standards. Needed on each A/C unit if you have two.
Why this signal Appears by name in owner top-mod lists; installers report thousands of installs.
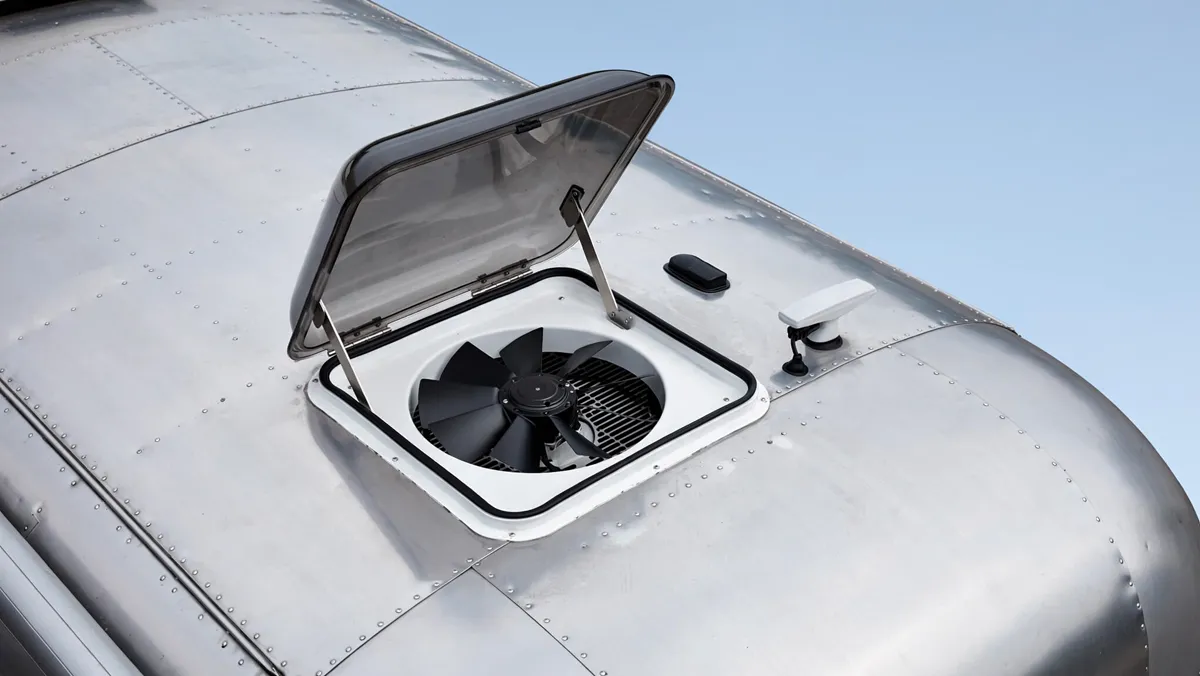
MaxxFan / MaxxAir powered roof vent
Aftermarket$300–375 (MaxxFan Deluxe)
A powerful 10-speed roof fan moves enough air to cut how often you need the A/C, and the built-in rain shield lets you leave it open in a downpour — so you can vent cooking heat and humidity even while parked in the rain. Owners swap the stock Fantastic/Magic Fan for it.
What owners pick MaxxFan Deluxe 7500K (remote, thermostat, built-in rain cover) is the one owners name; a MaxxShade or insulated pillow cover pairs with it for cold nights.
Why this signal Named by 3+ separate owners in the top-mods thread as a Fantastic/Magic-Fan replacement.
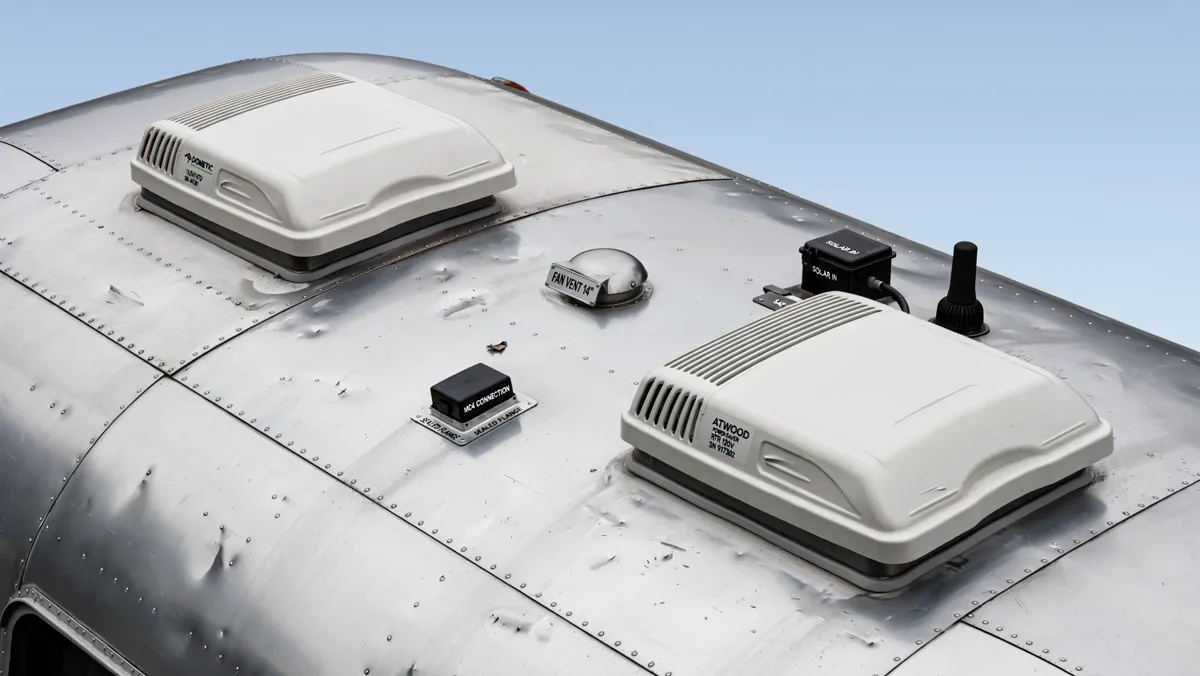
Second A/C with heat pump
Factory option$2,200
Adds cooling capacity for hot climates or larger floorplans and boosts the electrical system to 50 amps. Factory option on several International and Globetrotter floorplans (not all — e.g. excluded on the 30RB). The heat-pump function also extends shoulder-season heating without burning propane.
What owners pick Factory-only; most owners who camp in the South add it when ordering. Can't be retrofitted easily, so decide at order time.
Why this signal A factory-order spec rather than a community-driven mod — it didn't surface in the owner mod threads, so it's here as an option to know about, not a popular add.
Sources (1)
Touring-coach (Class B) upgrades
5Airstream’s Interstate, Atlas and Rangeline are self-propelled vans on the Mercedes Sprinter and Ram ProMaster — so the trailer kit above (brake controller, weight-distribution hitch, coupler locks) doesn’t apply. These are the upgrades van owners actually reach for instead.
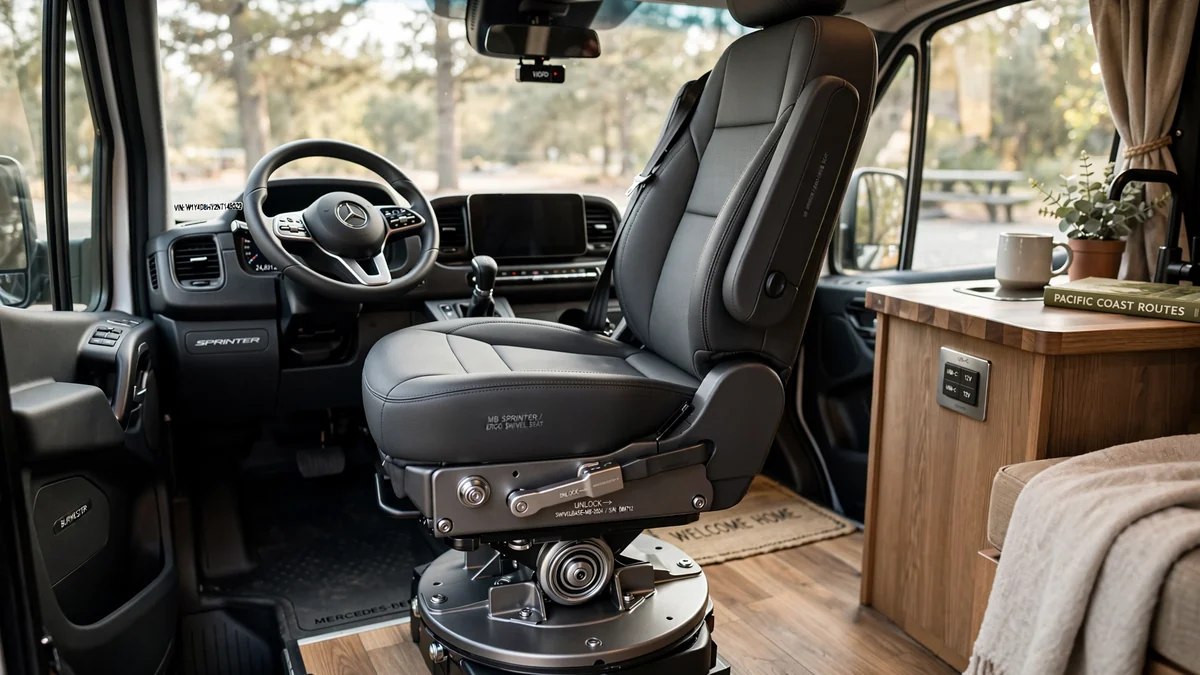
Cab seat swivels (driver + passenger)
Aftermarket~$300–$660 per pair
Turns the two cab seats around to face the living area, instantly adding two lounge seats and opening up a van’s tight floor plan. Scopema is the converter-standard brand; the US version is tested to FMVSS 207/210, raises the seat only ~7/8", and the driver kit includes a park-brake-handle relocation so the seat clears the brake. A near-default first mod on Sprinter and ProMaster builds.
What owners pick Scopema (a.k.a. RIB) for both Sprinter and ProMaster — owners specify the US FMVSS-tested version and note Sprinter seat bases can need the holes drilled out to sit square.
Why this signal Carried by every major van-conversion outfitter (Nomadic Supply, Sprinter Upgrades, Campervan-HQ) and called a standard conversion part.
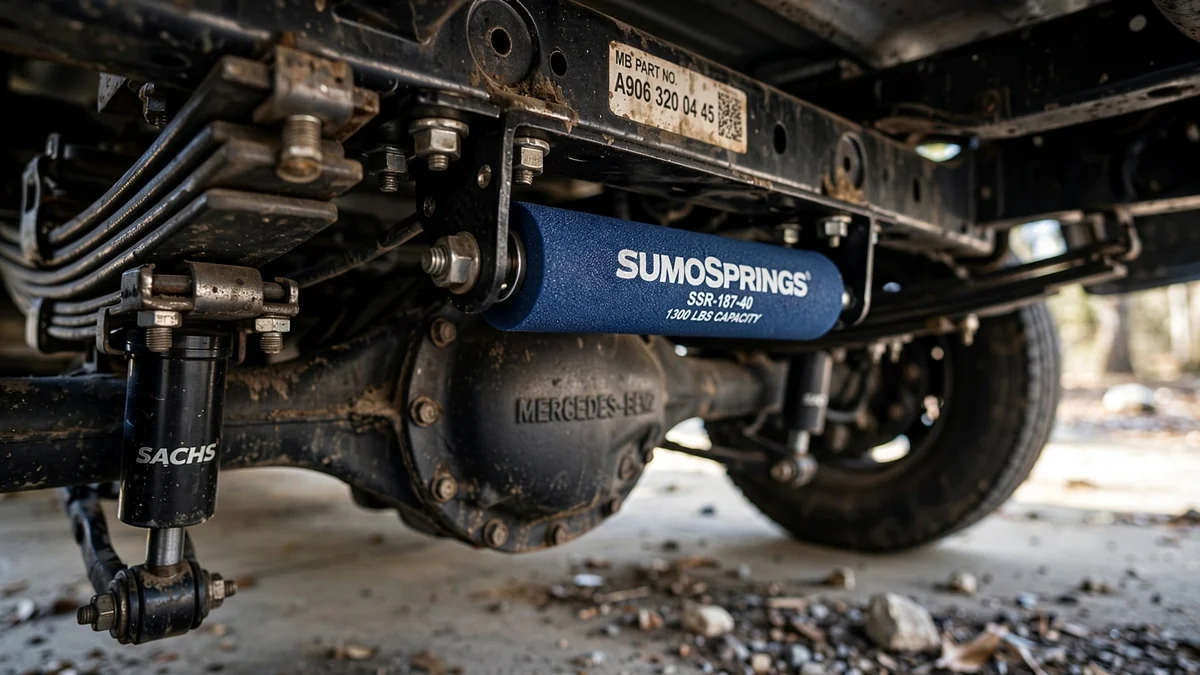
Suspension upgrade (SumoSprings / helper springs)
Aftermarket~$230–$670
A built-out van rides heavy and tall, so it sags, wallows and leans in corners. SumoSprings are maintenance-free progressive urethane bump-stops that bolt to the factory brackets (no drilling), level a sagging rear, cut body roll and damp the harsh rebound — the single most-recommended ride fix on Sprinter and ProMaster RVs. Never load past the chassis GVWR.
What owners pick Front + rear SumoSprings kit. Owners on full-time builds step up to the firmer black/yellow density; weekend rigs stay on blue to keep the unloaded ride soft.
Why this signal Recommended across van-life outfitters and Sprinter RV owner forums as the easiest, highest-value handling fix; some pair it with a rear sway bar.
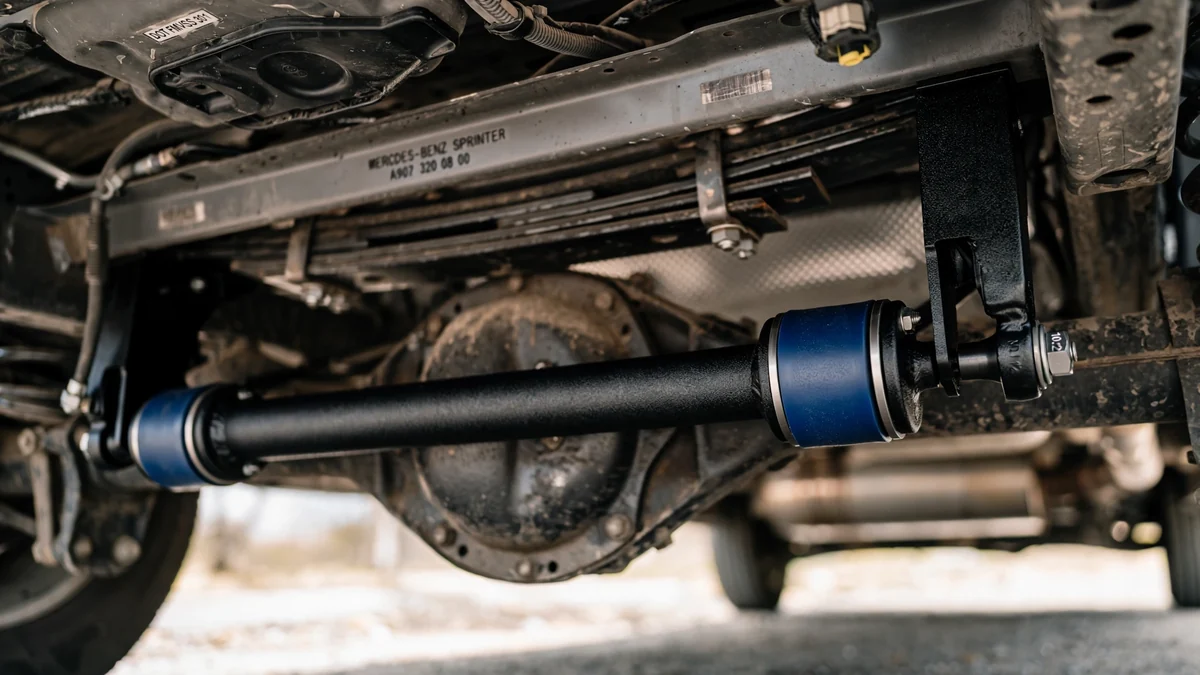
Rear anti-sway bar
Aftermarket~$300–$500
Mercedes ships the Sprinter with undersized sway bars, so an RV conversion — heavier and with a high center of gravity — rolls in corners and gets shoved around by crosswinds and passing trucks. A larger Hellwig chromoly rear bar bolts on in a couple of hours, reuses the factory end links, and noticeably steadies the coach in wind and cornering.
What owners pick Hellwig rear bar for the VS30 Sprinter 3500. Owners chasing the last bit of high-wind stability add it on top of SumoSprings.
Why this signal Well-regarded by Sprinter-coach owners and RV parts dealers; less universal than SumoSprings, and fitment depends on exhaust / leveling-jack clearance — inspect first.
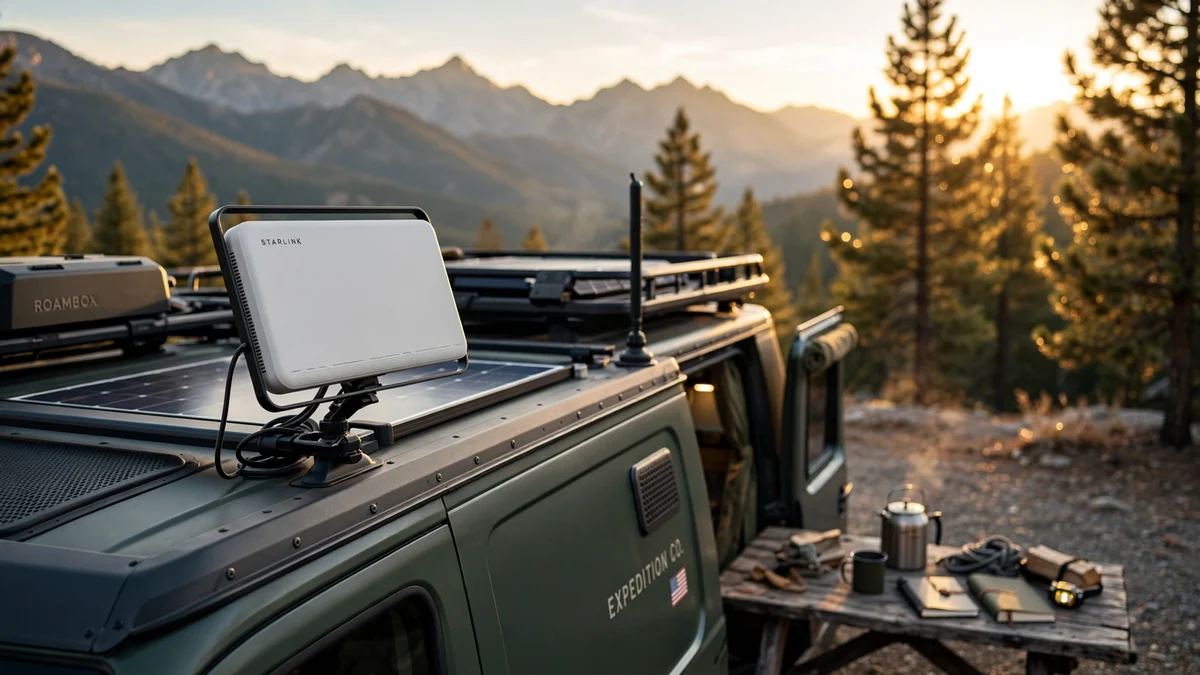
Satellite internet (Starlink Mini / Roam)
AftermarketMini $249–$349 hardware · Roam $50–$165/mo
Genuine high-speed internet (50–200+ Mbps, ~40 ms latency) anywhere you can see sky — the connectivity upgrade that changed remote work and boondocking. The laptop-sized Starlink Mini (~2.5 lb, built-in Wi-Fi router) sips ~20–40W, easy to run off a van or trailer’s lithium-and-solar bank; the Roam plan adds in-motion and a cheap off-season standby. Obstruction-free placement matters more than anything.
What owners pick Starlink Mini on the Roam plan, with a cellular hotspot kept as backup for congested or tree-covered sites.
Why this signal The dominant mobile-internet choice for full-time RVers and remote workers as of 2026; widely reviewed and documented, though a cellular backup is still advised.
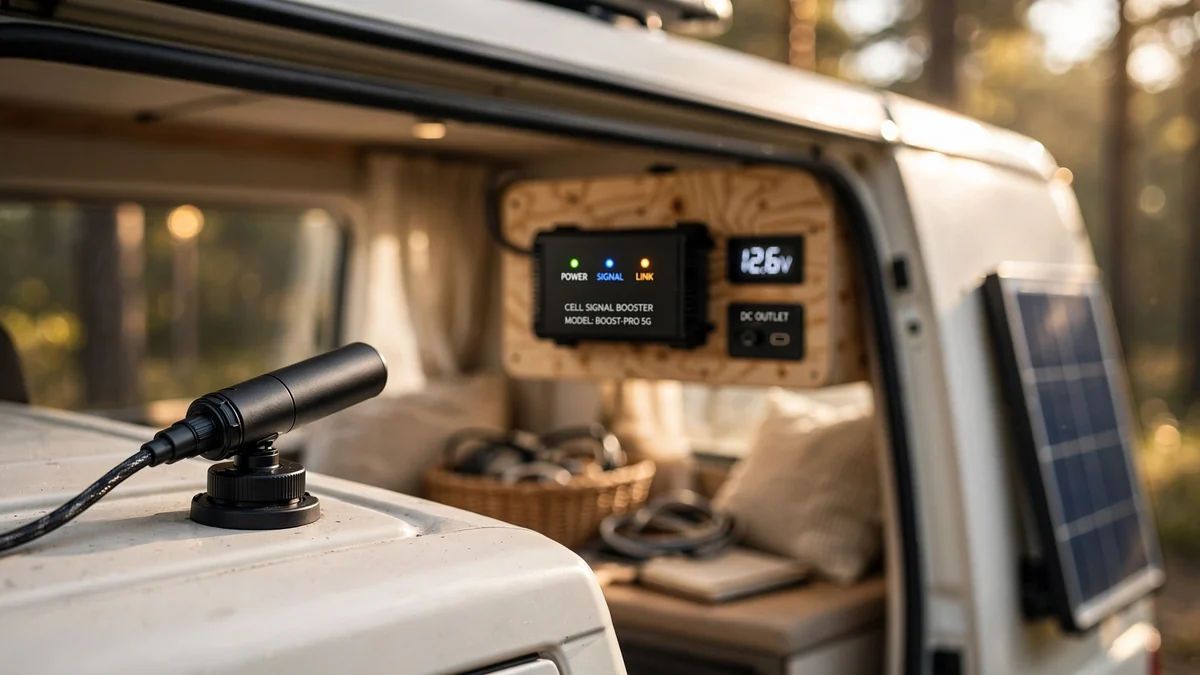
Cell signal booster
Aftermarket~$500
Pulls in a usable cellular signal where bars are thin — the cheaper, lower-power complement (or backup) to satellite for working on the road. A roof-mount weBoost Drive Reach amplifies weak tower signal for everyone’s phones and hotspots inside the rig; most useful at the fringe of coverage rather than true dead zones.
What owners pick weBoost Drive Reach (or the RV-specific Destination kit), kept as the backup when Starlink is blocked by trees.
Why this signal A long-standing road-warrior tool; increasingly a backup to Starlink rather than the primary link, so adoption is narrower than it once was.
Towing & safety
8The gear that keeps the trailer tracking straight and protects against the most common road and campground hazards. Forums and the Airstream Club treat the first items as non-negotiable.
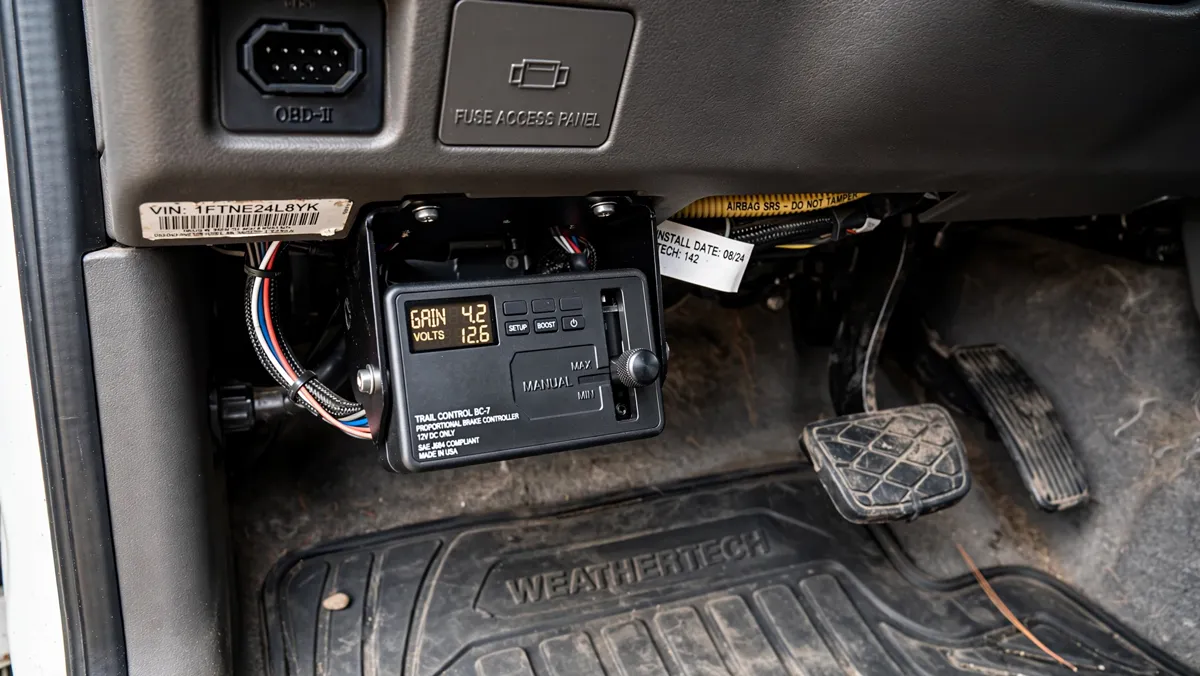
Brake controller
Factory or aftermarket$150–300 (Tekonsha P3)
Operates the trailer's electric brakes in proportion to the tow vehicle, so the rig stops as one unit instead of the trailer shoving the truck. Legally required to use trailer brakes in most states, and the foundation of safe towing. Many newer trucks have one built in; otherwise it's a quick add.
What owners pick Tekonsha Prodigy P3 is the long-standing proportional standard; built-in (integrated) controllers on newer trucks are fine too.
Why this signal The Airstream Club lists it first on its carry list and notes it's legally required for towing trailer brakes.
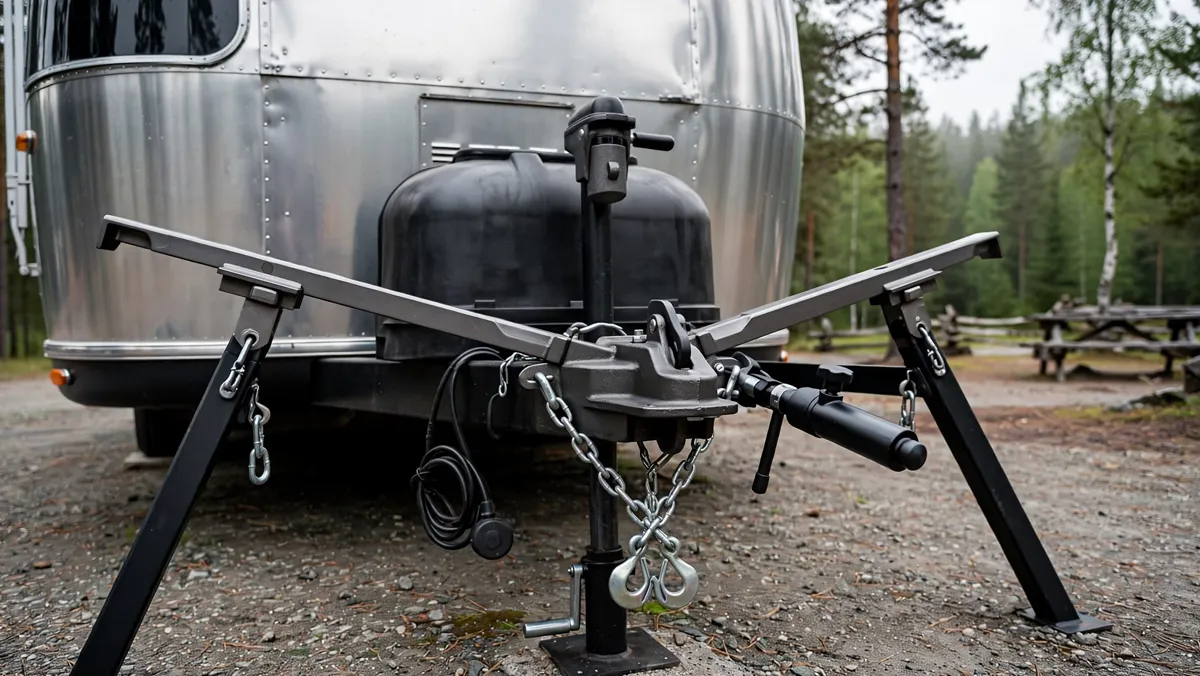
Weight-distribution + anti-sway hitch
Aftermarket$750 (Equal-i-zer) – $3,695 (ProPride 3P)
Distributes tongue weight across all axles and fights trailer sway — the biggest single towing-safety upgrade. Airstream's long wheelbase tows well, but a proper WD/anti-sway hitch transforms stability, especially in crosswinds and truck passes.
What owners pick Equal-i-zer 4-point (integrated sway, ~$750–950) is the value standard. ProPride 3P (Jim Hensley design, $2,995–3,695) is the no-sway premium pick enthusiasts swear by for larger trailers. Size the model to your loaded hitch weight.
Why this signal Treated as a foundational safety given rather than an optional upgrade.
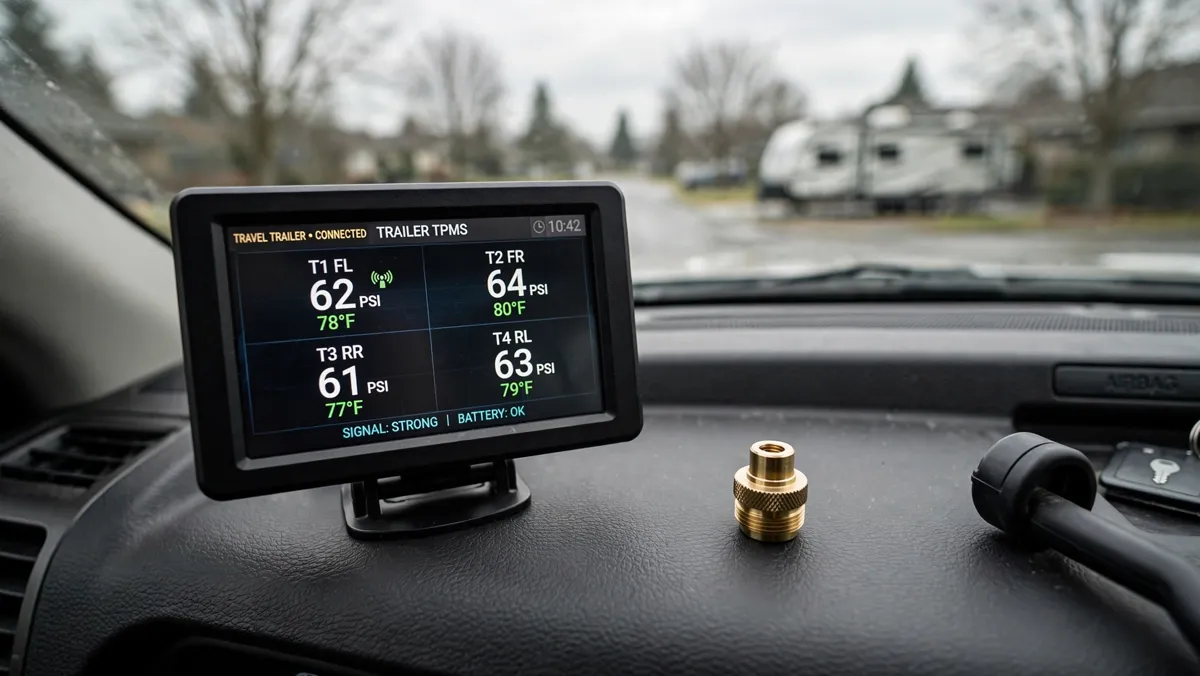
Tire pressure monitoring system (TPMS)
Aftermarket$250–450 (4–6 sensors)
Trailer tires fail far from the driver's seat; a TPMS alarms on pressure or temperature before a blowout that can shred a fender and bodywork. Universally recommended by the Airstream Club and owners.
What owners pick TST 507 (flow-through or cap sensors, color monitor; 6-sensor kit ~$446) is the enthusiast standard; a signal repeater is recommended for travel-trailer length.
Why this signal In the Airstream Club's 'Highly Recommended' tier, called out by the TST brand name.
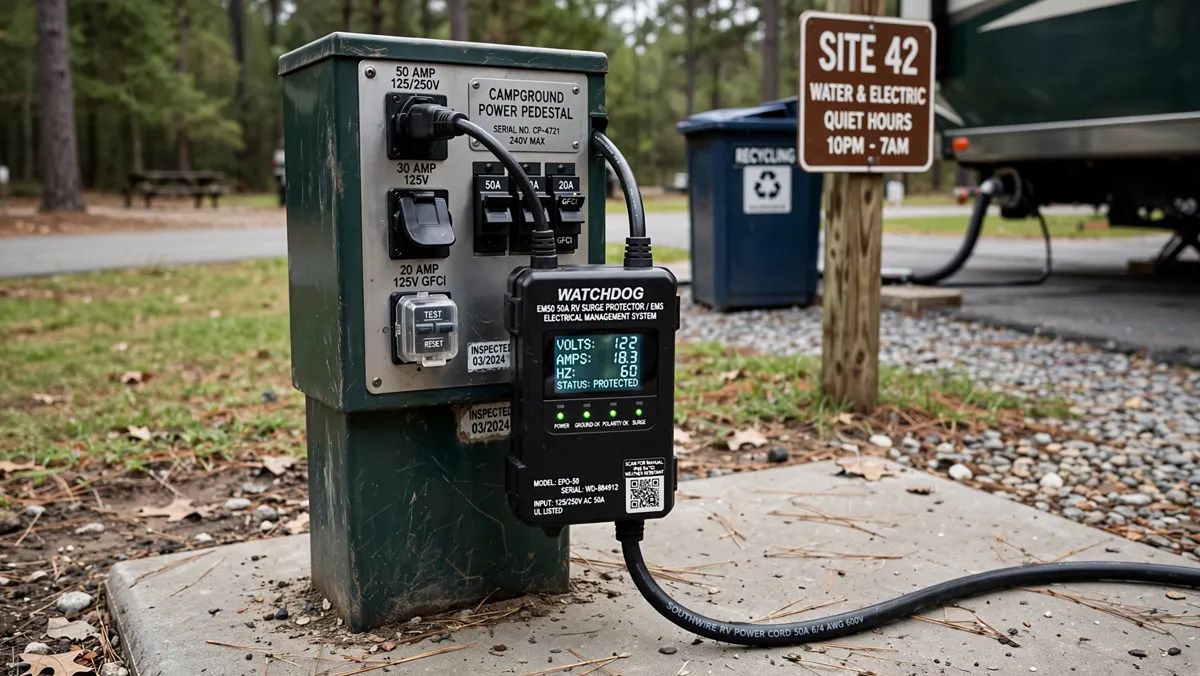
Surge protector / EMS
Aftermarket$100 (surge) – $350+ (full EMS)
Campground pedestals deliver miswired, low, or surging power that can fry the converter, A/C and electronics. A surge protector blocks spikes; a full Electrical Management System also disconnects on low/high voltage and wiring faults. Owners consider this cheap insurance.
What owners pick Progressive Industries EMS (portable or hardwired EMS-HW50C) and Hughes Autoformer are the recommended names; match 30A or 50A to your trailer.
Why this signal Airstream Club 'Highly Recommended'; owners mention hardwired Progressive 50A EMS by name.
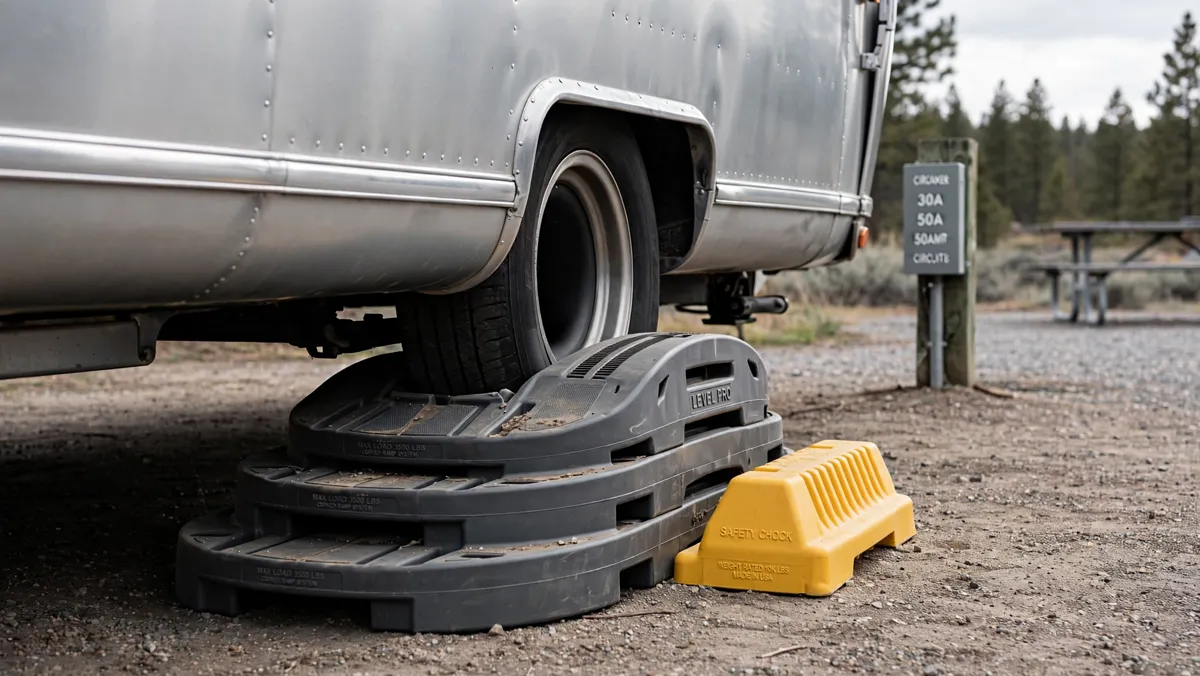
Leveling blocks & wheel chocks
Aftermarket$40–150
Campsites are rarely level, and the absorption fridge works best level. Curved drive-on levelers plus solid chocks are the fast, reliable setup the Airstream Club and owners recommend.
What owners pick Andersen Levelers are the most-recommended drive-on levelers; pair with X-chocks (dual-axle trailers) or standard chocks (single-axle).
Why this signal Blocks/chocks are in the Airstream Club's Essential tier; among the most-named basics by owners.
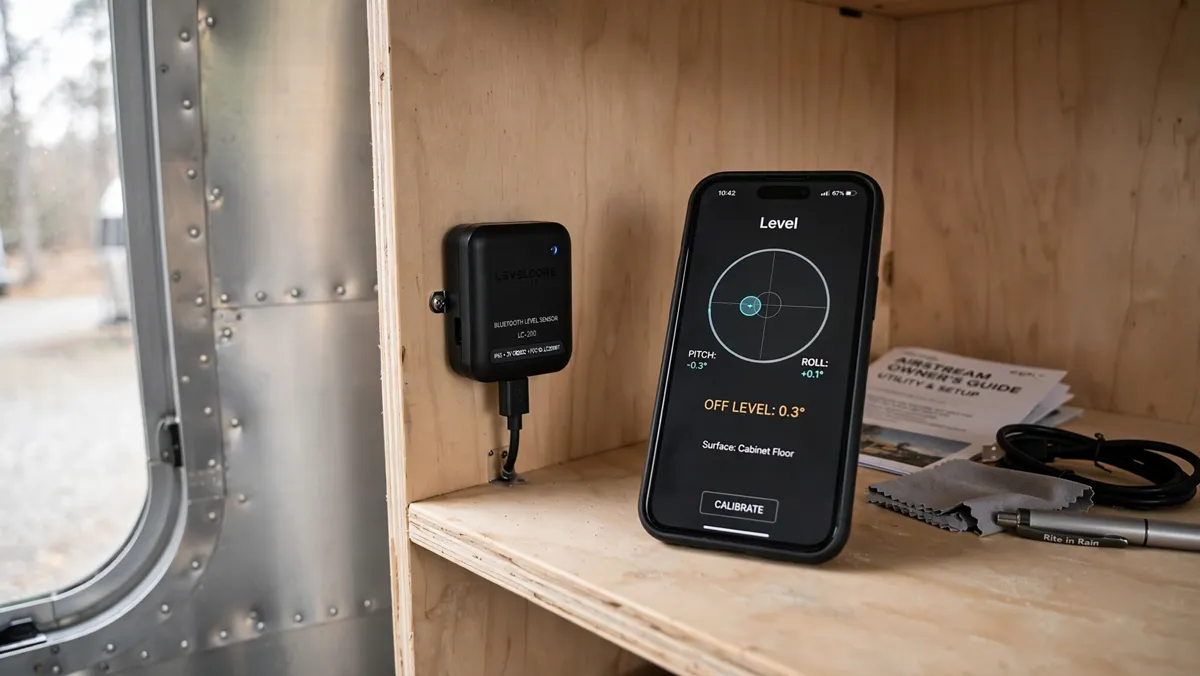
LevelMate Pro (Bluetooth leveling sensor)
Aftermarket~$100 (Pro) – $120 (Pro+)
A small box you mount inside the trailer that shows on your phone exactly how far off level you are, front-to-back and side-to-side — so you place blocks right the first time instead of guess-and-check. Pairs with leveling blocks above; owners rave about how much setup time it saves.
What owners pick LogicBlue LevelMate PRO+ is the named product, mounted near the axle and read over Bluetooth.
Why this signal A community darling — one owner called it 'probably my most favorite improvement'; named repeatedly alongside levelers.
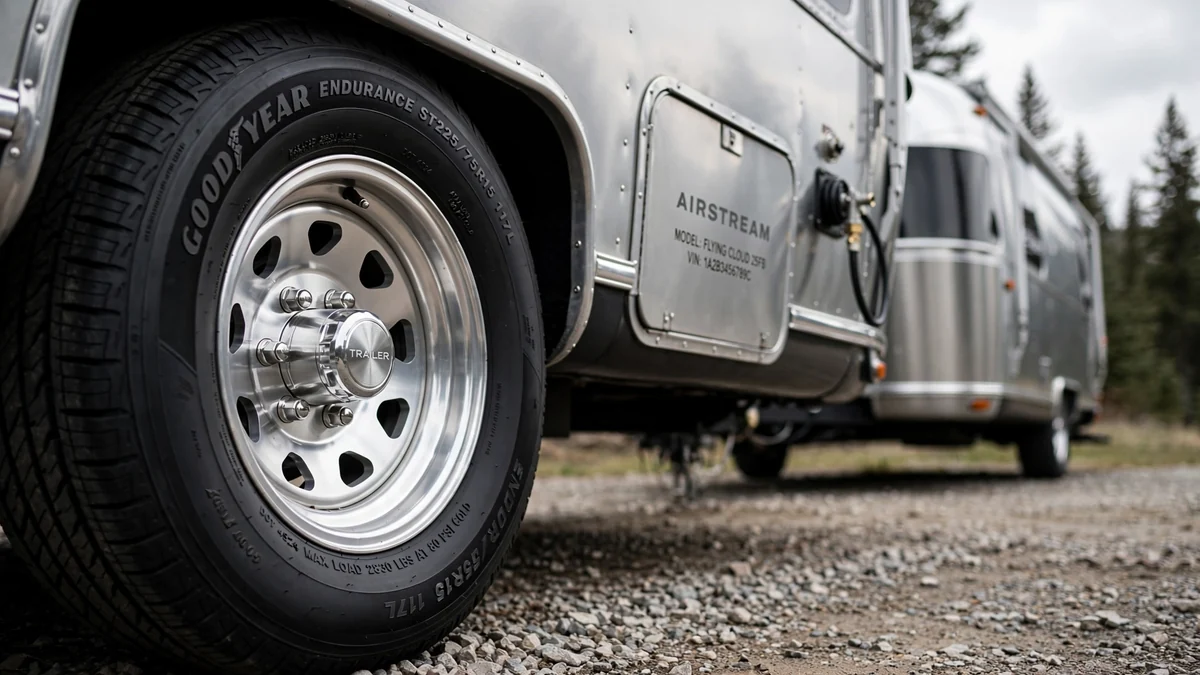
Upgraded tires (Goodyear Endurance / LT swap)
Aftermarket~$130–$250 per tire
Trailer-tire blowouts are one of the most common ways an Airstream gets hurt, and many cheap ST tires are overseas-made with poor reputations. Airstream itself fits the US-made Goodyear Endurance ST (e.g. ST225/75R15 load range E, 2,830 lb at 80 psi). Some owners go further to 16" wheels and light-truck (LT) tires for more load margin and a better ride — a bigger project that must clear the wheel well and keep the load rating. Replace ST tires by ~5 years regardless of tread.
What owners pick Goodyear Endurance as the like-for-like upgrade; the 16"-wheel + LT-tire swap for those who want maximum margin.
Why this signal The Endurance is Airstream’s own factory tire and the owner-default replacement; the LT/16" route is a well-documented but more involved choice.
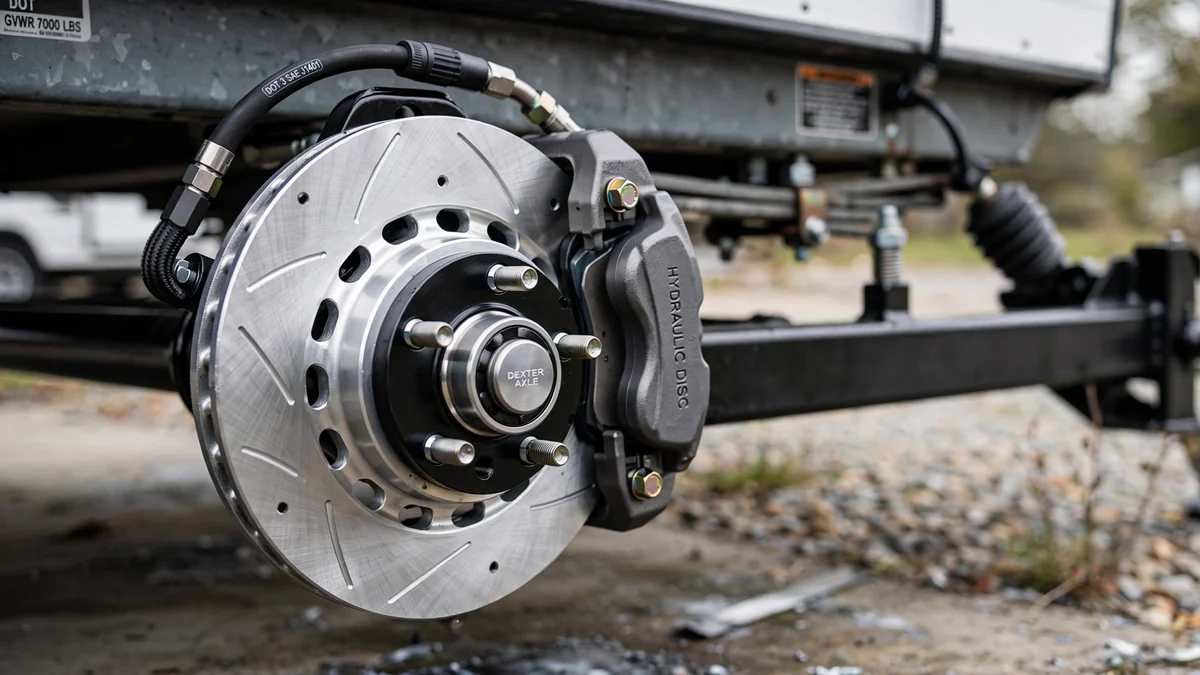
Disc brake conversion
Aftermarket~$1,500–$3,200 installed
Swaps the factory electric drum brakes for hydraulic disc brakes that stop shorter, fade far less on long mountain grades, and need no periodic adjustment. It’s not plug-and-play: disc brakes require an electric-over-hydraulic actuator that takes the signal from your brake controller and pressurizes the calipers, plus new lines run along the frame. A serious safety upgrade for heavy towing.
What owners pick Kodiak disc kits (coated or stainless for corrosion resistance) paired with a HydraStar electric-over-hydraulic actuator.
Why this signal Strongly praised by owners who tow heavy or in mountains, but the cost and install effort keep it from being a universal mod.
Water & plumbing
4Cleaner water in, better pressure, less water used off-grid, and protecting the plumbing.
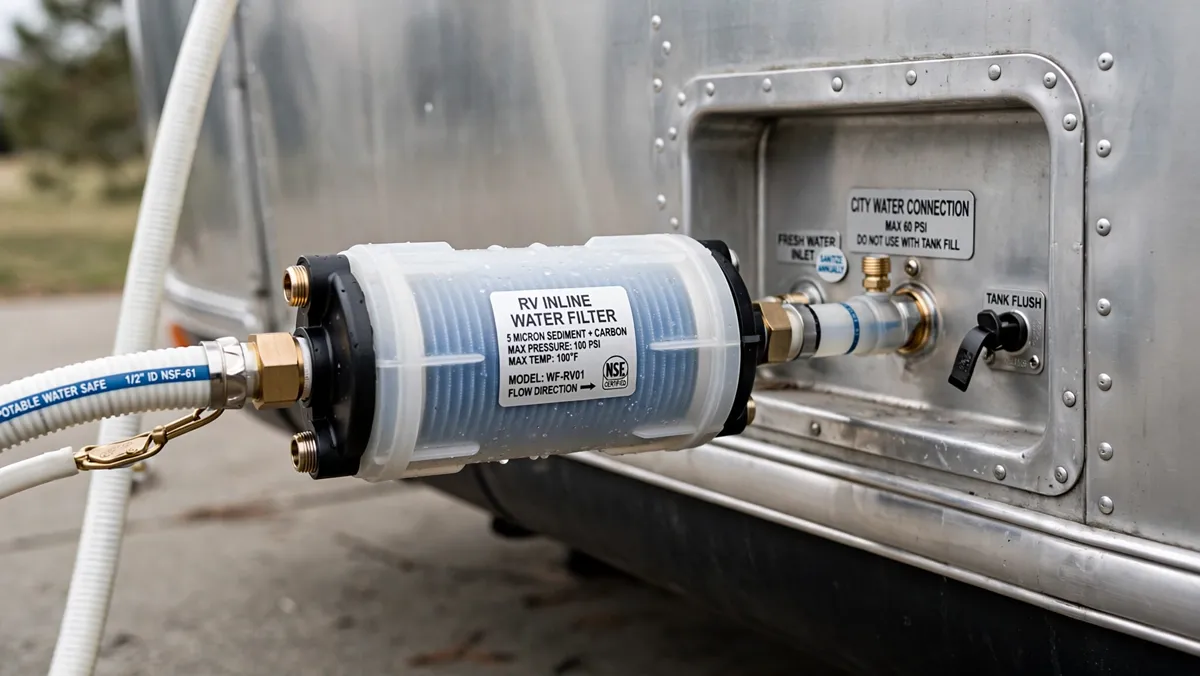
Inline / upgraded water filter
Aftermarket$20 (inline) – $300+ (multi-stage)
Removes sediment, chlorine taste and impurities from campground water. Owners who care about taste step up from cheap blue inline filters to a higher-flow multi-stage system, often with a separate drinking filter inside.
What owners pick Basic Camco inline for most; the Airstream Club and owners call out Blu Technology / Clearsource multi-stage filters plus a Seagull/Acuva drinking filter for serious filtration.
Why this signal In the Airstream Club's Highly Recommended tier and named by owners (Blu Tech, Seagull, Acuva).
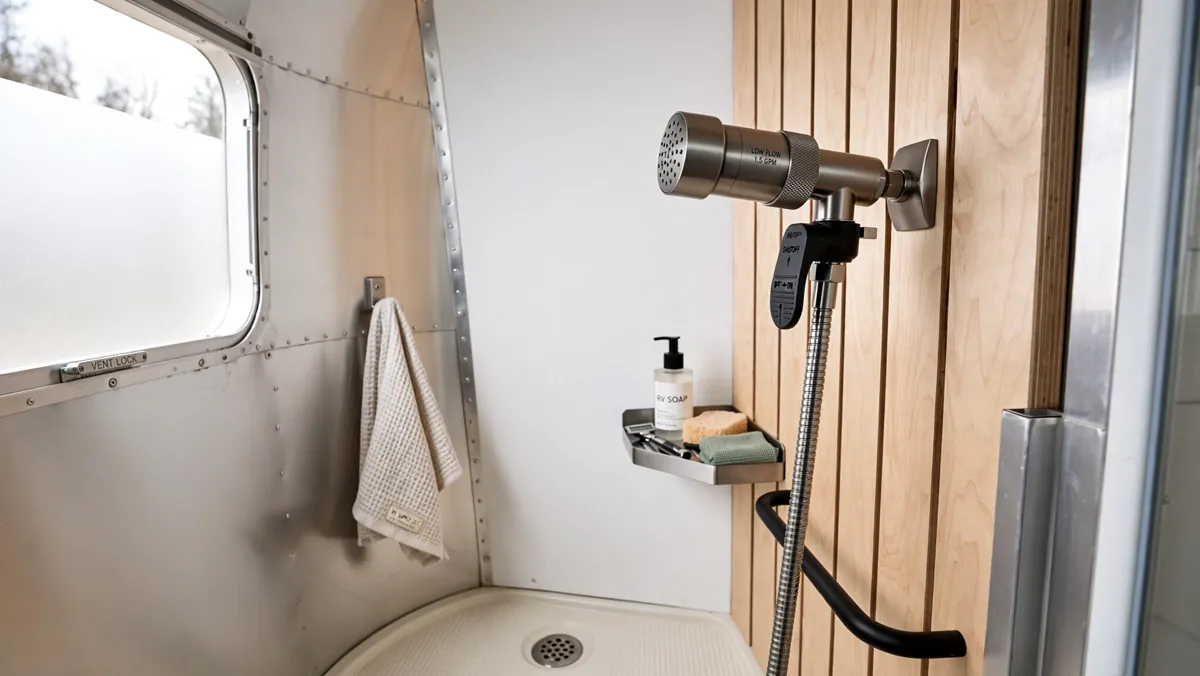
Oxygenics shower head + full cutoff valve
Aftermarket$30–120
A high-pressure, low-flow shower head with a true cutoff valve in the handle lets you do a 'navy shower' — full pressure, then off, without losing the temperature mix — which stretches fresh water and slows grey-tank fill off-grid. One of the most-loved cheap mods.
What owners pick The Oxygenics shower head ('great pressure, uses hardly any water') plus a head with a separate complete cutoff is the combo owners name.
Why this signal Owners specifically praise the Oxygenics head and a full-cutoff handle; the older 'recirc valve' framing was more creator-driven.
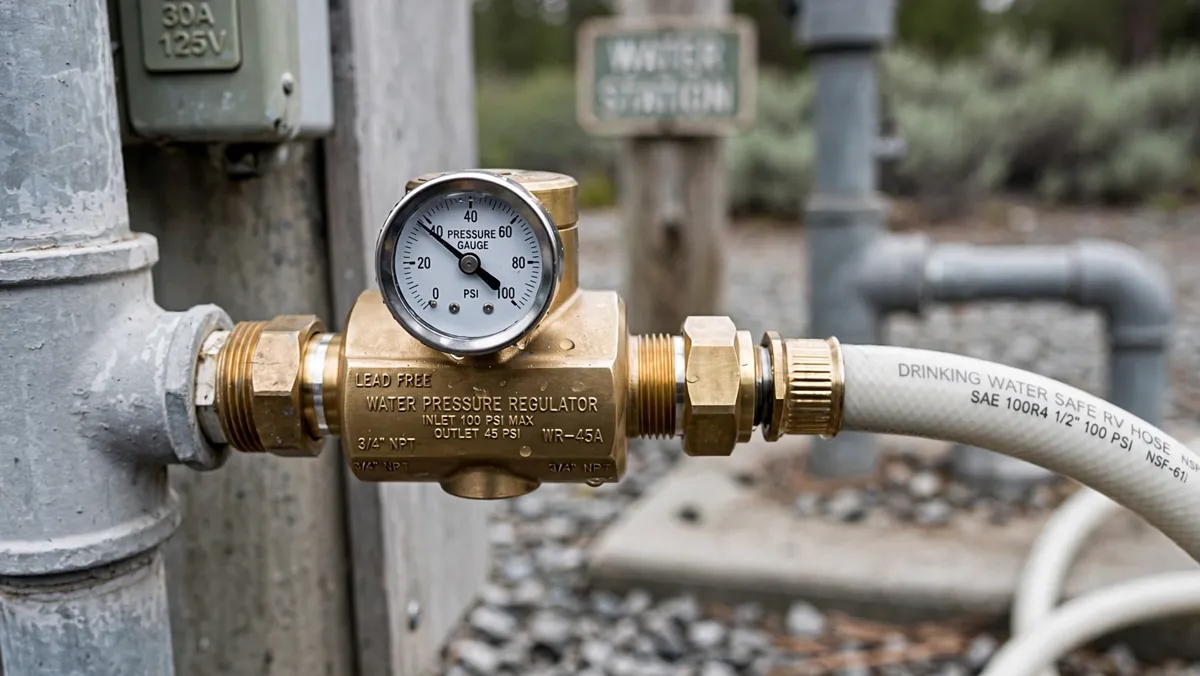
Water pressure regulator
Aftermarket$15–60
Campground water pressure can spike high enough to burst RV plumbing lines. An adjustable regulator with a gauge protects the system — a cheap, universally recommended first buy that's more 'baseline gear' than passion upgrade.
What owners pick Adjustable brass regulators (e.g. Renator, Valterra) with a gauge are the common pick.
Why this signal Universally owned but assumed baseline gear — rarely celebrated as a 'mod', just expected.
Sources (1)
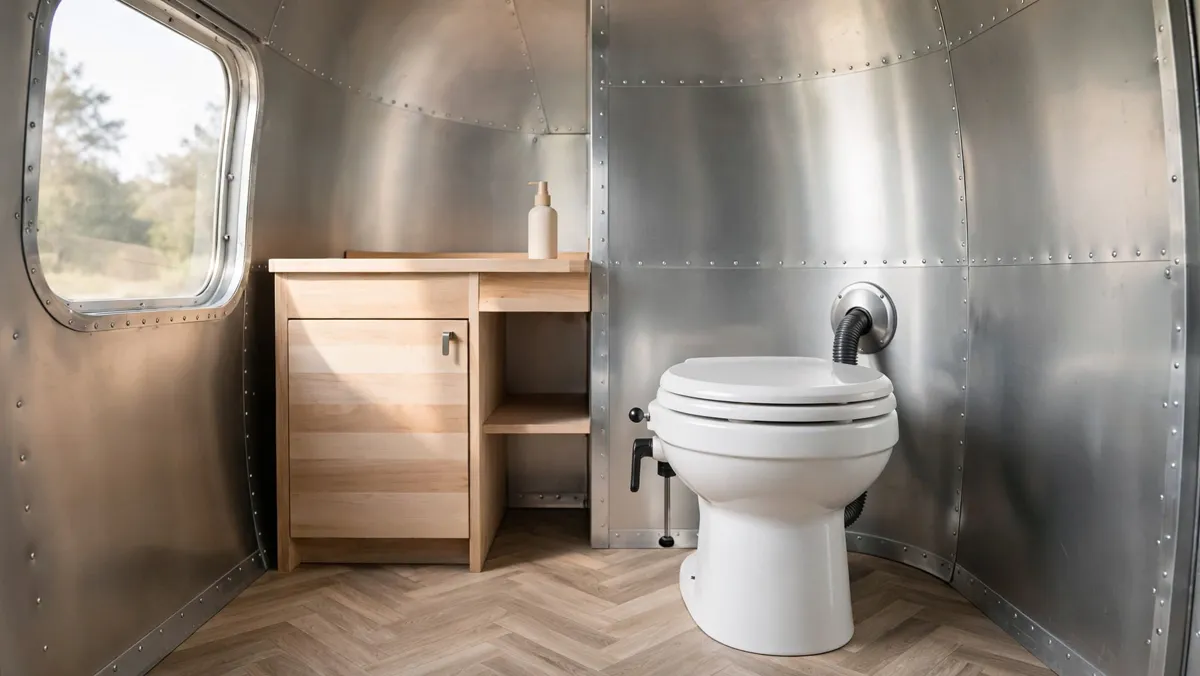
Composting toilet (OGO / Nature's Head)
Aftermarket$785 (OGO) – $1,030 (Nature's Head)
Replaces the flush toilet and black tank with a waterless composting unit that separates liquids from solids. Saves fresh water, eliminates dumping the black tank, and frees up clearance and cargo — a passion upgrade for serious dry-campers. Trade-offs: you empty the liquids often and it's a real plumbing change, so it's not for everyone.
What owners pick OGO (compact, electric mixer) and Nature's Head (the long-standing standard) are the two names owners install; some do a full 'black-tank delete'.
Why this signal Polarizing — the Outside owner's single favorite upgrade, but a love-it-or-leave-it choice. Boondockers love it; many owners keep the standard black tank.
Interior, lighting & comfort
8The small, popular quality-of-life mods owners do in the first season — most are cheap DIY.

Mattress upgrade or topper
Aftermarket$356–504 (Airstream Supply) · topper from ~$100
The stock mattress is widely considered too firm and too thin; a replacement or a good topper is one of the most common first-season comfort fixes, especially for full-timers. Custom RV sizes mean a standard mattress rarely fits, so owners buy RV-cut.
What owners pick Airstream Supply Co. sells trailer-cut mattresses; owners also use a latex/memory-foam topper or a Beddy's zip-around set sized for the bed.
Why this signal The factory mattress is a near-universal complaint; owners swap or top it early.
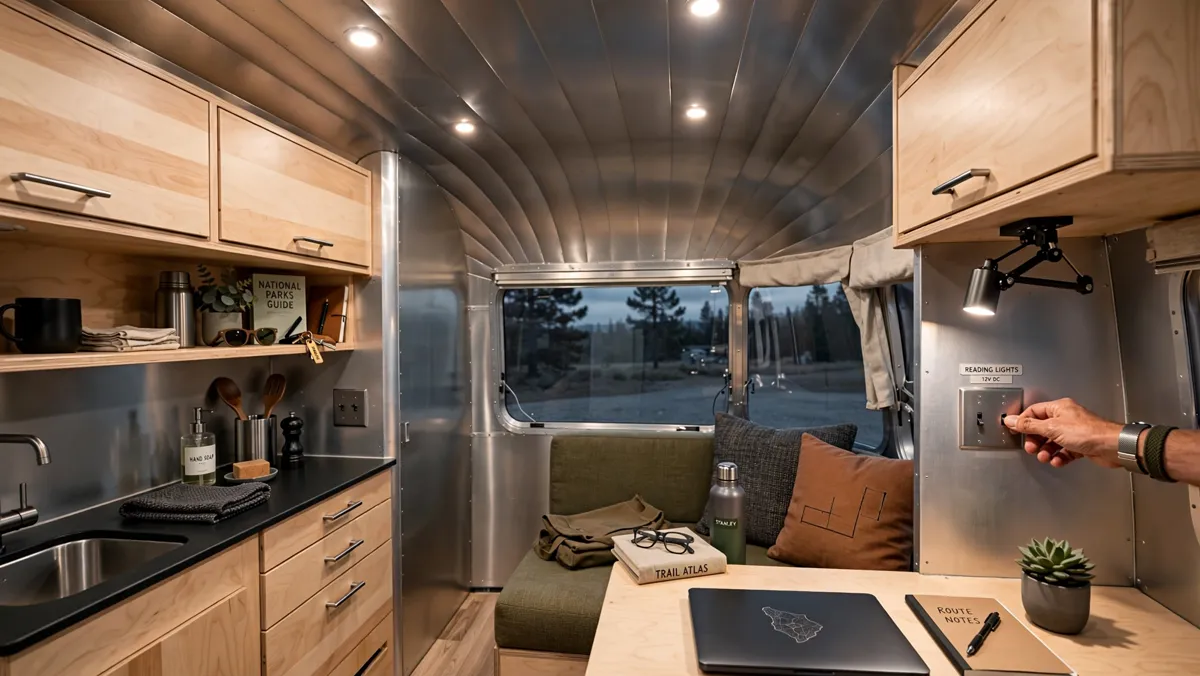
LED lighting conversion
Aftermarket$3–10 per bulb (~$50–150 a coach)
Swapping incandescent/halogen bulbs for warm-white LEDs cuts lighting power draw by ~90% (a big deal off-grid) and reduces heat. A cheap, satisfying first mod — mostly relevant to older trailers, since current Airstreams already ship LED.
What owners pick Direct-fit 921/1141 warm-white LED replacements; owners pick warm white (~3000K) to keep the cozy look.
Why this signal Cheap, universal, repeatedly done — the Outside owner converted all lights to LED; older rigs especially.
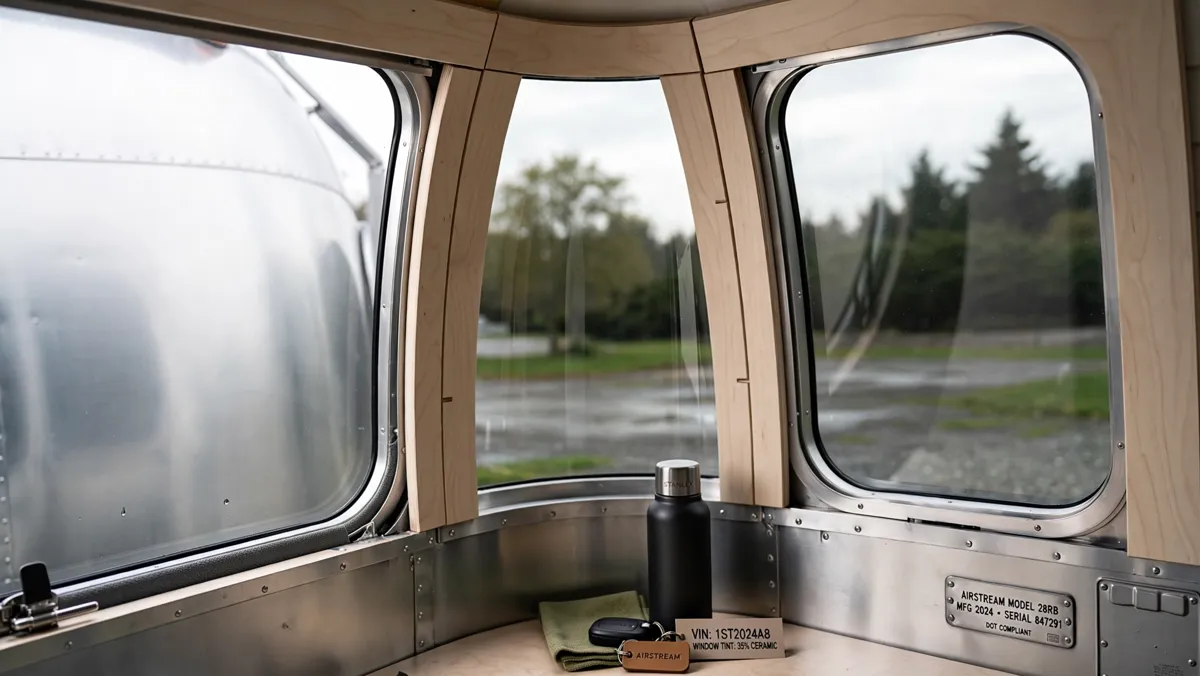
Window film / tint
Aftermarket$200–600
Airstream's wraparound windows let in a lot of heat and sun; tint cuts cabin heat and glare and adds daytime privacy. Recurring item on 'upgrades I'd do again' lists.
What owners pick Professional ceramic tint is the common route; some owners also swap the door's screen-guard panel for clear glass for better visibility.
Why this signal Owners list tinted front windows among top mods to 'stop the heat'.
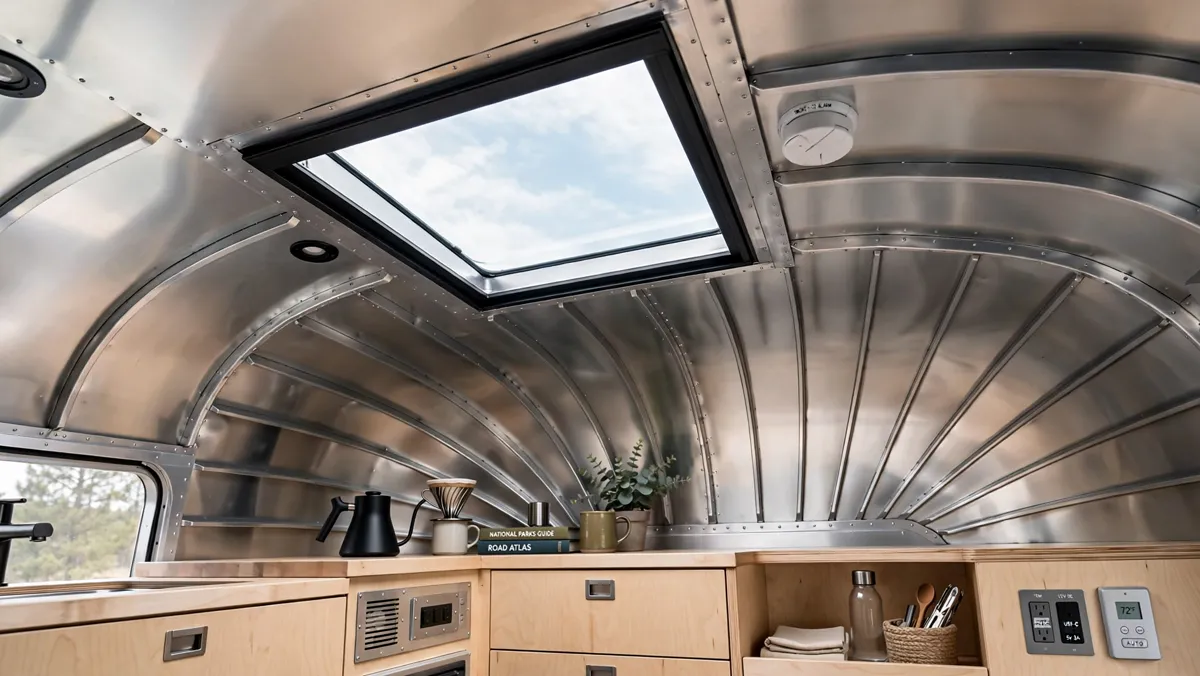
Glass skylight upgrade
Aftermarket$300–700
Replaces the stock plastic dome with a clear glass skylight for a better view and a more premium feel. Popular cosmetic + light upgrade.
What owners pick Maxim Skylights is the brand owners name.
Why this signal The 'Maxim' glass skylight is named by multiple owners in the top-mods thread.
Sources (1)
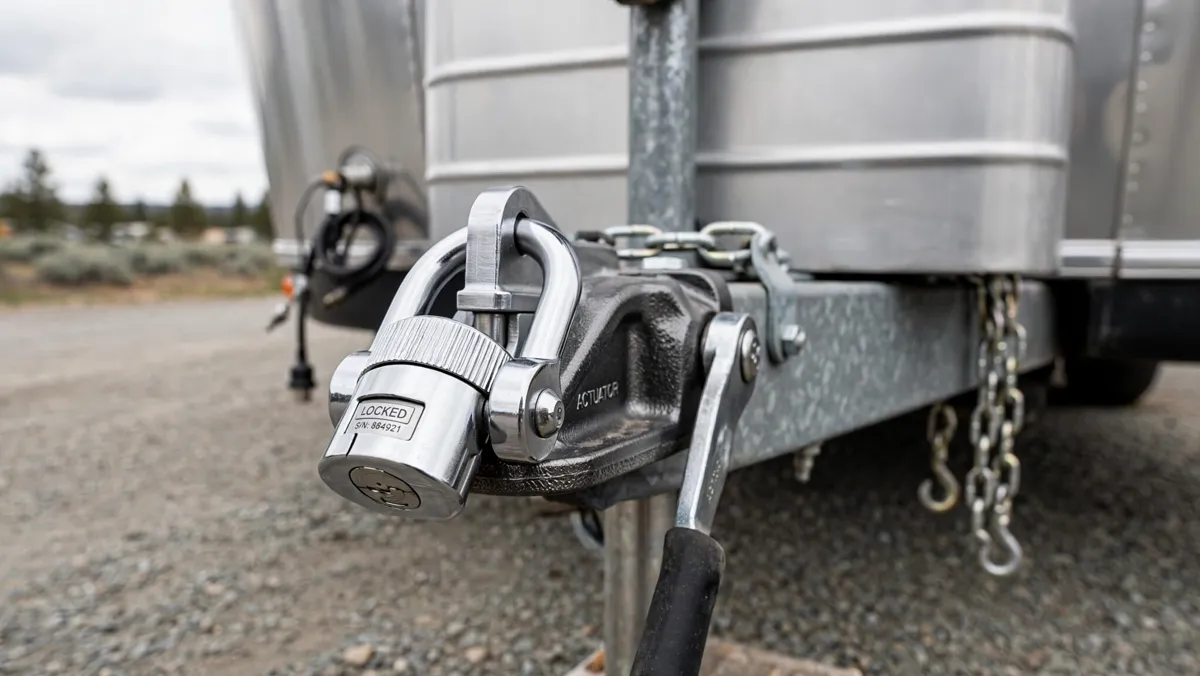
Anti-theft / hitch & coupler locks
Factory or aftermarket$20–150
Locks the coupler and hitch so a thief can't simply tow the trailer away, hitched or unhitched. Recommended security basic.
What owners pick Airstream's Anti-Theft Lock Kit or a heavy-duty coupler lock (e.g. Trimax) on the hitch.
Why this signal A steady security basic — owners mention coupler/chrome locks; not a hot debate, but widely owned.
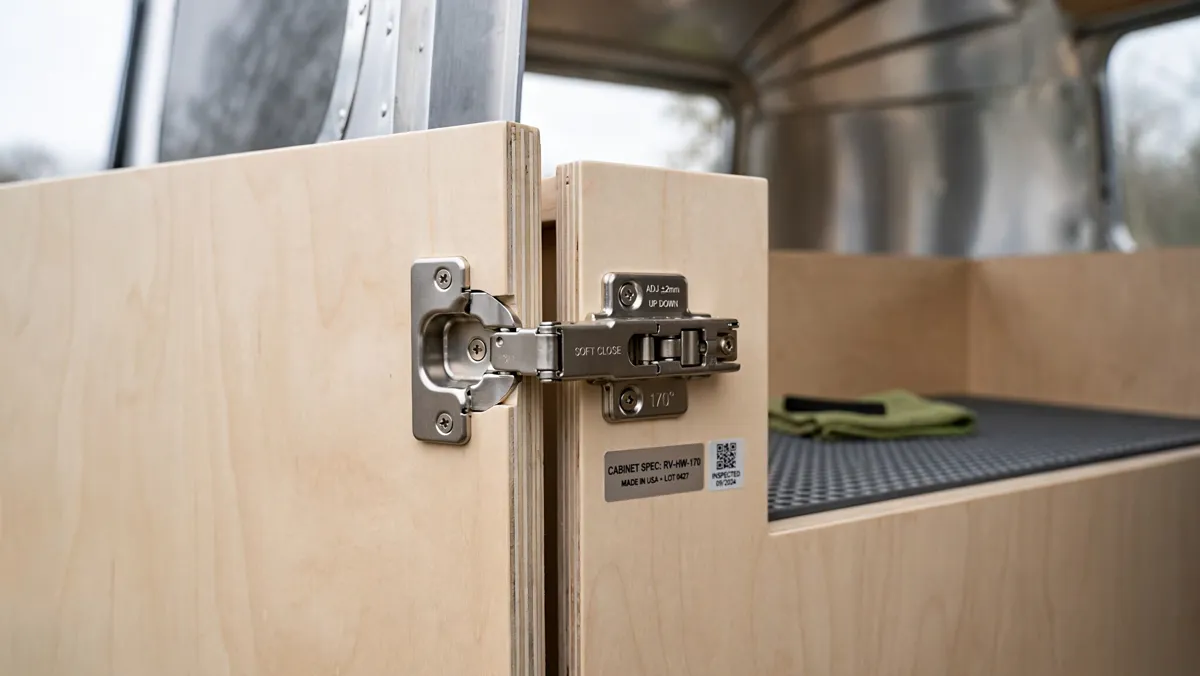
170° soft-close cabinet hinges
Aftermarket$10–40
Stock cabinet doors only open partway; swapping to 170° hinges gives full access to closets and lockers. Cheap, high-satisfaction DIY fix.
What owners pick 170° soft-close hinges (Amazon/ROK) — a top community 'fixes' recommendation.
Why this signal A common DIY 'fix-it' rather than a headline passion mod — popular in owner fix lists, lower signal in the top-mods threads.
Sources (1)
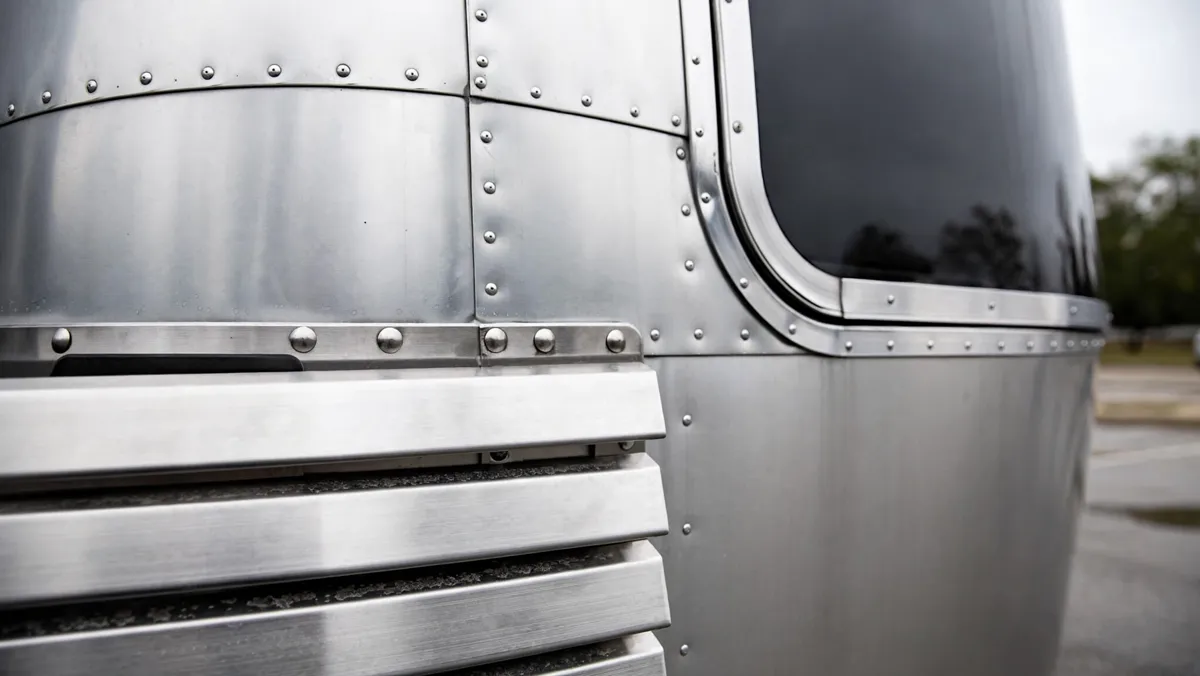
Stainless exterior trim & rock/window guards
Factory or aftermarket$40 (single) – $875 (full bundle)
Swap plastic exterior parts for stainless for durability and shine; padded window and stone guards protect the shell and windows from road debris. Airstream sells both as customization kits.
What owners pick Airstream's stainless upgrade bundle (sold in pieces or as a complete set) and stone/window guard kits — no drilling.
Why this signal Low community heat — one weak owner mention; mostly a cosmetic/protective preference.

Reflective window covers / thermal shades
Aftermarket~$20 DIY – $300 custom set
Airstream’s wraparound windows (and a van’s big windshield) are huge thermal holes — blazing in summer, freezing in winter, and zero privacy at night. Reflective covers reflect up to ~96% of radiant heat and, installed with an air gap, cut window heat loss roughly 3x — plus they black out the cabin. DIY Reflectix panels (silver out in summer, in for winter) are the cheap classic; tailored magnetic or snap-in sets are the tidy upgrade, and the cab/windshield cover is a near-must on Class B vans.
What owners pick DIY Reflectix panels cut from window templates; van owners step up to a fitted insulated cab/windshield cover for heat, cold and stealth.
Why this signal A perennial “upgrades I’d do again” item for both trailers and vans; cheap, high-impact, and frequently DIY’d before buying a custom set.
Prices are typical 2025–2026 US street prices for reference, gathered from manufacturer and retailer listings and the owner sources cited on each card — not quotes. Factory option prices and availability vary by floorplan and model year; confirm with an Airstream dealer. Independent reference, not affiliated with Airstream, Inc.
How to read this schedule
Intervals are “whichever comes first.” Every task is traced to a primary source — Airstream’s own published schedule, the axle/appliance/tire makers — cited on each card. We flag where an Airstream differs from a typical RV, because following the wrong schedule is how owners damage these trailers.
By cadence
By severity
No tasks match those filters.
Before every trip
5The walkaround that prevents the failures that strand people. Airstream's own guidance is to inspect tires and test every lug nut before each trip, re-check lugs after any wheel has been off, and never tow with the propane on. None of this needs tools beyond a pressure gauge and a torque wrench.
Check tire pressure (cold) on all tires + spare
Under-inflation is the number-one cause of trailer-tire failure: a soft tire builds heat at highway speed until the casing lets go. Airstream's schedule lists a cold tire-pressure check at the most frequent interval (every 1,000 mi / 60 days) and tells you to check before every trip. Set to the pressure on the tire placard / data plate, not the number molded on the sidewall (that's the max). Don't forget the spare — it's no help at the right moment if it's flat.
With tires cold (parked 3+ hours and driven less than ~1 mi), set every tire including the spare to the placard PSI; never bleed pressure from a hot tire. A blowout-prevention TPMS that watches pressure and temperature while you tow is the most-recommended tire upgrade.
Applies to All Airstream travel trailers
Free to do yourself. The only outlay is a one-time quality tire gauge (~$10–30) and a 12V inflator if you don’t have one; a TPMS automates the check. No reason to pay a shop. est. source
Test every lug nut / torque to spec
Wheel separation is a real failure mode on trailers, which is why Airstream prints a WHEEL SEPARATION CAN OCCUR warning. Airstream's current published torque is 110 ft-lbs for aluminum wheels and 100 ft-lbs for steel wheels (older manuals listed 95–120 — always use the figure for your model year). After any wheel has been removed, re-torque at 10, 25 and 50 miles as the clamp load settles.
Use a calibrated torque wrench, not an impact gun, in a star pattern. Current Airstream spec: aluminum 110 ft-lbs, steel 100 ft-lbs. Re-torque at 10/25/50 mi after any wheel service or winter storage.
Show diagram
Applies to All Airstream travel trailers
Free to do yourself. The one-time cost is a calibrated torque wrench (~$30–110) — never an impact gun. Re-torque after a wheel service is normally free. est. source
Inspect tires for dry rot, uneven wear & age
Airstream tells you to inspect for dry rot and uneven wear before every trip, and to inspect the whole tire — both inside and outside sidewalls, tread, valve stems and caps — before a trip and after storage. Sidewall crazing means the rubber is breaking down; uneven wear points to an axle out of alignment or worn suspension. Trailer tires almost always age out before they wear out (see the tire-age item under Annual).
Look for fine sidewall cracks (dry rot), cuts or bulges, and any wear that's heavier on one edge. Uneven wear → have the axle alignment checked at a dealer. Replace if cracking or tread damage is deeper than 2/32 in. Keep tires covered in storage to slow UV aging.
Applies to All Airstream travel trailers
Pure visual check — no cost. Acting on what you find (replacement) is priced under replace-tires-by-age / tire-set-replacement; an axle-alignment check for uneven wear is a separate dealer charge. est. source
Test safety systems: brakes, breakaway, lights, hitch
A quick functional test of the things that keep the trailer attached and stoppable. The breakaway switch applies the trailer brakes if it ever separates from the tow vehicle — a dead breakaway battery makes it useless. Confirm the brake controller responds, all running/brake/turn lights work through the 7-way, and the coupler is latched and pinned.
Tug-test the hitch coupler, confirm breakaway battery holds charge, cycle the brake controller, and have someone verify all 7-way lights. Check for loose hitch bolts or unusual wear.
Applies to All Airstream travel trailers
Functional test costs nothing to do yourself. If a breakaway battery, bulb, or 7-way connector needs replacing, those parts are a few dollars to ~$30; a mobile tech checking it would bill a service-call/diagnostic (~$50–130). est. source
Shut off propane & secure the trailer for travel
Airstream is explicit: don't travel with the LP tank valves on — an open propane system is a fire hazard in a collision or if a line chafes through. A propane (absorption) refrigerator must never run on gas while driving for the same reason; an electric/compressor fridge is fine in motion. Finish the walkaround by closing every roof vent and fan lid (highway wind can rip an open lid off the roof) and securing loose gear, since Airstream likens 30 minutes of towing to a sustained earthquake.
Close both LP cylinder valves. If you have an absorption/propane fridge, switch it off gas (or to 12V/electric) before driving; an electric compressor fridge can stay on. Close and latch all roof vents and the Fantastic/MaxxAir fan lid. Stow and secure loose items, and confirm the entry door and compartment latches are shut.
Applies to All Airstream travel trailers (propane-off applies to all; the fridge step applies to absorption/propane fridges — mostly pre-2022 models)
No parts needed — just a few minutes of your time.
Sources (3)
- Airstream Support — Access, Use, Remove & Refill propane tank (don't travel with LP valves on; fire hazard)
- Airstream Support — operating the electric or propane fridge (never leave a propane fridge running while traveling; electric is fine in motion)
- Airstream Support — exhaust fan (always close the lid when in motion or wind can rip it off)
Monthly · every ~1,000 miles or 60 days
6Airstream's most-frequent service block, plus the light housekeeping that keeps the shell and air systems healthy. Quick checks on the safety detectors, battery, and escape window, and the wash-and-filter routine Airstream recommends about every four weeks.
Test smoke, CO & LP detectors
A travel trailer combines a propane system, a combustion water heater and furnace, and people sleeping in a sealed aluminum tube — CO and smoke detection is non-negotiable. Airstream lists testing the smoke alarm and CO detector in the every-1,000-mi/60-day block. Detectors also have a finite life and must be replaced as whole units at end of life (see the multi-year block): Airstream says replace the smoke alarm at 10 years and the CO alarm by its 6-year “replace by” date, and the LP detector lasts about 7 years.
Press-to-test each detector and replace backup batteries as needed (Airstream suggests fresh batteries at the start of each camping season). Check the date on each unit and plan whole-unit replacement at its stated end-of-life.
Applies to All Airstream travel trailers
Monthly testing is free. Buying replacements at end-of-life is costed separately under “Replace smoke, CO & LP detectors.” est. source
Sources (3)
- Airstream Support — smoke & CO alarms (replace smoke alarm 10 years from purchase; CO “Replace By Date” is 6 years from date of manufacture)
- Airstream Support — maintenance schedule (smoke alarm & CO detector: test and replace battery)
- First Alert / NFPA 72 — replace smoke alarms at 10 yr, CO and combo alarms at ~7 yr
Check battery & test the GFCI
Airstream lists a battery check and a GFCI test-and-record in the 1,000-mi/60-day block. On a flooded lead-acid bank, check the electrolyte level and top up with distilled water only (this doesn't apply to AGM/glass-mat or lithium). Airstream's battery guidance is to check AGM connection points for corrosion every 30 days and keep state of charge up; don't let voltage sit below ~12.4 V (about 75–80%). Testing the GFCI confirms your shore-power protection is live.
Lead-acid: check water level, top up with distilled water only. AGM/lithium: skip the water, check terminals for corrosion and confirm state of charge (keep above ~12.4 V). Press TEST then RESET on the GFCI outlet and confirm it trips.
Applies to All Airstream travel trailers (water-level step applies to flooded lead-acid only)
Checking state of charge, topping flooded cells with distilled water (~$2–8/gal), and pressing TEST/RESET on the GFCI all cost essentially nothing. Replacing the battery itself is priced under battery-replacement; a failed GFCI outlet is a ~$15–25 part. est. source
Check escape window & exterior latches
The emergency-escape window is a life-safety exit; Airstream lists checking its latch and upper-hinge operation in the most-frequent block, and lubricating those latches (with WD-40 or light household oil) in the 10,000-mi block. While you're at it, confirm exterior compartment latches and the entry door are operating and not working loose from road vibration.
Open and close the escape window, confirm the latches and upper hinge move freely and seal; a shot of light oil on a stiff latch keeps it working. Verify exterior latches are secure.
Applies to All Airstream travel trailers
Operating the escape window and checking latches is free. A drop of the lubricants you already buy for the quarterly lock/hinge task covers any stiffness. est. source
Clean the air-conditioner return-air filter
A clogged A/C filter chokes airflow, makes the rooftop unit work harder, and pushes dust back into the cabin. Airstream's recommended routine is to pop off the interior vent cover, clean the filter, dry it, and reinstall — a five-minute job that protects the most expensive appliance on the roof. In dusty travel or heavy summer use, clean it every couple of weeks.
Pop off the interior A/C vent cover, pull the foam/mesh return-air filter, blow it out with canned air or rinse with water, let it dry fully, then reinstall. Never run the A/C without the filter, and never reinstall it wet (mold).
Applies to All Airstream travel trailers with a ducted or non-ducted rooftop A/C
The return-air filter is washable, so monthly cleaning is free. A replacement filter or coil service is costed under the annual “Deep-service the rooftop A/C.” est. source
Wash the exterior (with the grain) & rinse the awning
Airstream recommends washing the trailer about every four weeks, more often in coastal or industrial areas, and removing road-treatment chemicals immediately after winter travel. Use only clear-coat-safe automotive wash and always work with the grain — horizontal strokes, never up-and-down — or you'll leave fine scratches that catch the sun. Washing is also the best time to spot broken seals, missing rivets, and loose trim. Hose off the Zip Dee awning fabric with clear water (no soap) each month so dirt can't embed and grow mildew.
Wash top-to-bottom in shade with a clear-coat-safe soap and a soft mitt, moving with the grain of the aluminum. Rinse the awning fabric with plain water and let it dry fully before rolling it up. Remove road salt/chemicals immediately after winter trips. (Never use an automatic drive-through car wash — the brushes scratch clear-coat aluminum.)
Applies to All Airstream travel trailers (polished/clear-coated aluminum shell; Zip Dee awning)
A routine wash is just soap and water. The seal conditioner and clear-coat-safe wax/polish are a twice-a-year cost, tracked under “Clean & treat window/door seals; wax the shell.” est. source
Monitor interior humidity (keep it ≤ 60%)
Airstream calls controlling interior relative humidity 'one of the most important steps' to prevent moisture damage in an aluminum trailer, where condensation can collect behind skins and in lockers. The target is 60% or less (35% or less in cold weather to avoid window condensation). A $30 hygrometer plus the exhaust fan, A/C, or a small dehumidifier keeps you in range.
Keep a small hygrometer inside and aim for ≤60% relative humidity (≤35% in freezing weather). Run the vent fan while cooking and showering, use the A/C or a portable dehumidifier in humid climates, and empty the dehumidifier bucket regularly.
Applies to All Airstream travel trailers
No parts needed — just a few minutes of your time.
Quarterly · every ~5,000 miles or 90 days
6Lubrication and the moving hardware that keeps working only if it's cared for: locks, hinges, the propane hold-down and regulator vent, the breakaway switch, the entry step, the range hood, and the window seals. Airstream specifies the exact lubricant for each so you don't gum up a lock with the wrong product.
Lubricate locks, hinges & latches (correct lube each)
Road grit and salt seize up locks and hinges if they're never lubricated — and using the wrong product makes it worse (oil in a lock attracts grit). Airstream specifies dry graphite for the main door latch and exterior door locks, and light household oil for exterior hinges and the LPG hold-down.
Dry graphite into the door locks and main latch; a drop of light household oil on exterior hinges and the LPG hold-down. Avoid petroleum products on window gaskets.
Applies to All Airstream travel trailers
A DIY job: a tube of dry graphite, a small bottle of light household oil, and a block of paraffin total roughly $10–25 and last for years. Rarely worth hiring out. est. source
Service the breakaway switch & 7-way plug
The breakaway switch is the last line of defense if the trailer ever separates — Airstream's procedure is to pull the pin and lubricate with household oil, and replace the pin immediately after. Spraying the 7-way plug with contact cleaner keeps brake-controller and lighting signals reliable through a corroded connector.
Pull the breakaway pin, lubricate with household oil, reinsert (replace a worn pin). Spray the 7-way trailer plug contacts with electrical contact cleaner; a dab of dielectric grease slows corrosion.
Applies to All Airstream travel trailers
Electrical contact cleaner (~$8–12) and a drop of oil; a replacement breakaway pin/switch is only a few dollars to ~$15. DIY-friendly. est. source
Lubricate hitch ball & check LPG regulator vent
A dry hitch ball wears the coupler and squeals; Airstream calls for hitch-ball lube or wheel-bearing grease. The LPG regulator's bottom vent must be clear of mud-dauber nests and debris so the regulator can breathe and deliver steady propane pressure — a blocked vent causes erratic appliance operation.
Grease the hitch ball (skip this on friction anti-sway hitches — check your hitch maker's guidance). Inspect the LPG regulator's bottom vent for obstructions and clear gently.
Applies to All Airstream travel trailers
A tub of grease covers the hitch ball for years; clearing the regulator vent is free. Skip the grease on friction anti-sway hitches. est. source
Lubricate & inspect the entry door step
Airstream's 5,000-mi/90-day block specifically lists the main door step: lubricate and inspect its moving parts. A folding or powered entry step takes constant road grime and a hard daily duty cycle; a dry, gritty pivot binds, rattles, and eventually fails to deploy or retract.
Wipe the step's pivots and slides clean, lubricate the moving parts (light oil or silicone on a manual step; follow the maker's spec on a powered step), and check for loose mounting bolts, bent arms, or a weak return spring.
Applies to All Airstream travel trailers (manual folding or powered entry step)
No parts needed — just a few minutes of your time.
Clean the range-hood fan & filter
Airstream's 5,000-mi/90-day block lists the range exhaust hood: clean the fan blades and wash the filter. Cooking grease loads the mesh filter and coats the blades, cutting airflow so moisture and odors linger inside — which works against the humidity control that protects an aluminum trailer.
Pull the range-hood grease filter and wash it in warm soapy water (or run it through the dishwasher), let it dry, and wipe the fan blades and housing clean of grease before reinstalling.
Applies to All Airstream travel trailers with a range/cooktop exhaust hood
No parts needed — just a few minutes of your time.
Protect window seals so windows don't stick
Airstream's escape and lounge windows have rubber seals that, in hot or dusty conditions, get sticky and bond the glass to the frame — and forcing a stuck window can crack the glass. Airstream's fix is preventive: every three months, clean the seals and apply 303 Aerospace Protectant (or olive oil) where the window meets the body. Never use a petroleum-based product, which makes the sticking worse.
Clean the window seals with soapy water, then wipe on 303 Aerospace Protectant (or olive oil in a pinch) every ~3 months — more often in hot climates. If a window does stick, gently work a credit card around the gasket to release it; lift both window handles evenly so you don't crack the glass. No petroleum products on the seals.
Applies to All Airstream travel trailers
No parts needed — just a few minutes of your time.
Twice a year · every ~10,000 miles or 6 months
5The big mechanical block: brakes, the sealed Nev-R-Lube bearings (which Airstream says to inspect, not repack — this is where Airstreams differ from greaseable-hub RVs), tire rotation, a full wax, and the awning hardware. This is the work that protects the running gear and the famous aluminum shell.
Inspect Nev-R-Lube sealed bearings — do NOT repack
This is the single most-misapplied Airstream maintenance item. Modern Airstreams ride on Dexter Torflex axles with Nev-R-Lube sealed-cartridge bearings — pre-lubricated, sealed for life, carrying a 5-year / 100,000-mile limited warranty. Airstream's instruction is to visually inspect the bearings at tire rotation and defer to Dexter — NOT to repack them. The 'grease every 12,000 mi / 12 months' rule you'll read everywhere is for Dexter's E-Z Lube greaseable hubs, a different axle; pumping grease at a Nev-R-Lube cartridge does nothing useful. Replace the cartridge (a press job) if you find play, noise, roughness or heat.
At each tire rotation, check each wheel for excessive end-play, listen/feel for roughness, and watch for heat or seal weeping after a drive. Any of those → have the sealed cartridge replaced per Dexter spec. Don't try to 'grease' a Nev-R-Lube hub. (E-Z Lube hubs, if your axle has them, do get repacked/greased per Dexter every ~12,000 mi / 12 mo — know which axle you have from the data plate.)
Show diagram
Applies to Airstreams with Dexter Nev-R-Lube axles (most modern models). E-Z Lube hubs follow Dexter's grease interval instead.
Inspection is free — Nev-R-Lube cartridges are sealed and must never be repacked. Replacing a failed cartridge (~$150–400+ per hub) is a rare, condition-based repair, not a scheduled one. est. source
Inspect electric brakes
Airstream lists brake inspection (inspect or replace as necessary) in the 10,000-mi/6-month block. Worn magnets, thin shoes, or scored drums all lengthen stopping distance on a heavy trailer. Many Dexter brakes are now self-adjusting (Nev-R-Adjust); older or manually-adjusted brakes need their shoe-to-drum gap set.
Pull a drum (or inspect through the access slot) to check shoe thickness, magnet wear and drum surface. Confirm the brake controller's gain is set so the trailer brakes firmly without locking. Set adjustment on non-self-adjusting brakes.
Applies to All Airstream travel trailers with electric brakes
The twice-a-year task is an inspection. A full brake service when shoes/magnets actually wear (~$60–115/axle in parts DIY, ~$150–400/axle at a shop) is occasional and condition-based — not every six months. est. source
Rotate tires & lubricate the spare carrier
Airstream lists 'tires: inspect and rotate' and lubricating the spare-tire carrier's moving parts in the 10,000-mi/6-month block. Rotation evens out wear across positions; a seized spare carrier is a miserable surprise on the roadside.
Rotate per your manual's pattern and re-torque lugs at 10/25/50 mi afterward. Lubricate the spare carrier's moving parts so it actually lowers when you need it.
Applies to All Airstream travel trailers
DIY if you can safely jack and support the trailer. Shops charge little or nothing for a rotation (often free with tires bought there); a few dollars of grease keeps the spare carrier working. est. source
Clean & treat window/door seals; wax the shell
Airstream calls for cleaning window and door seals with mild detergent and coating them with a silicone seal treatment ('Slipicone') in the 10,000-mi block, and waxing the exterior. On the polished/clear-coated aluminum, Airstream recommends waxing in spring and fall with Walbernize Super Seal or another clear-coat-safe wax; in coastal or winter-salt conditions, more often. (Routine washing is its own monthly item.) Always work with the grain — horizontal strokes — or you'll leave fine scratches that catch the sun.
Clean seals with mild detergent, treat with a silicone seal conditioner (not petroleum). Wax with a clear-coat-safe product in spring and fall, working with the grain. Remove road salt immediately after winter travel.
Applies to All Airstream travel trailers
DIY: a silicone seal conditioner plus a clear-coat-safe wax or aluminum polish runs ~$20–70 and does several applications. A professional travel-trailer wash & wax runs from ~$79 (basic) up to ~$229–339 (premium/with wax), or ~$7–13/ft mobile; heavy oxidation polishing costs much more. est. source
Inspect & lubricate the Zip Dee awning
Airstream's awnings are Zip Dee units with Sunbrella fabric, stainless hardware, and aluminum struts, and they last for years only if the hardware is maintained. Airstream's routine: confirm all mounting brackets are tight, check pivot points for enlarged holes or broken rivets, check end caps for cracks, confirm the awning rail is tight to the body with all screws snug, and check the canopy for loose stitching or shrinkage. Clean and lubricate the tension knobs and pivots with aerosol silicone — not WD-40 or grease, which attract dirt and don't leave a lasting film.
Twice a year, tighten mounting brackets and rail screws, inspect pivots/rivets/end caps and the stitching, and lubricate tension knobs and pivot points with aerosol silicone lubricant. Every 2–3 years give the Sunbrella fabric a deep clean (Zip Dee WashOut or ¼ cup mild natural soap per gallon — no detergents or commercial awning cleaners), then rinse thoroughly and air-dry. Always retract the awning in wind or when you leave camp.
Applies to Airstream travel trailers with a Zip Dee patio/window awning
Cleaning and lubricating is essentially free. Replacing worn Zip Dee fabric (~$80–180 DIY fabric, ~$180–400 installed) is an occasional, condition-based expense — not a semiannual one. est. source
Annual
10The once-a-year jobs that protect the structure and the systems: resealing the seams that keep water out of an aluminum monocoque, the propane leak-down test, the combustion appliances (furnace, fridge, A/C), the water-heater anode (on Suburban tanks only), the running gear underneath, and the single most important number on your tires — their age.
Inspect & reseal exterior seams, windows, vents
Water intrusion is the thing that quietly destroys a trailer, and an Airstream's defense is the sealant along its riveted aluminum seams, awning rail, windows, lights and roof penetrations — not a rubber roof membrane. Airstream's guidance: twice a year (spring and fall, timed to winterize/de-winterize) inspect all sealant for discoloration, cracking, gaping or dryness and reseal as needed. Because the shell is aluminum with sealed seams, this is NOT the 'recoat the rubber roof / Dicor lap sealant' job from typical RVs — Airstream uses specific sealants per joint: Acryl-R Seam Sealer for segment seams, windows, beltline, rub rail and lights; AdSeal (gray on trim/windows/doors, white on rooftop components); and black AdSeal or Sikaflex 221 on wheel wells and the underbelly.
Twice a year (fall/spring), inspect the roof around vents, the awning rail, side-sheet seams, doors and windows for cracked or lifting sealant. Reseal with the correct Airstream-spec sealant for that location (Acryl-R / AdSeal gray/white / Sikaflex black), or have the dealer do it. Don't apply rubber-roof lap sealant to an aluminum Airstream.
Show diagram
Applies to All Airstream travel trailers (aluminum body, sealed seams)
A yearly DIY inspect-and-spot-reseal is a tube or two of the correct Airstream-spec sealant. A full professional exterior reseal (~$2,350–3,050) is a periodic every-few-years job, not annual. est. source
Replace tires by age — not by tread
Trailer ('ST') tires almost always time out before they wear out: the rubber oxidizes and the casing weakens from the inside even while the tread looks deep, because a parked trailer's tires don't flex enough to circulate their own anti-aging compounds. Airstream's own literature says trailer tires over five years old should be inspected by a tire expert and replaced even with no apparent tread wear; the industry guideline is to replace ST tires around 5–7 years from their build date, and the makers' hard ceiling is 10 years for any tire. Read the DOT date code (last four digits = week + year; e.g. 3523 = 35th week of 2023) on every tire, including the spare.
Once a year, read the DOT date on every tire and the spare. Plan replacement at ~5–7 years from build date; never run any tire past 10 years. Keep tires covered in storage and off bare ground to slow UV and ozone aging.
Show diagram
Applies to All Airstream travel trailers
Reading the DOT date code is free. The cost is the replacement itself when tires hit ~5–7 years — see the tire-set-replacement item for tire and mounting prices. est. source
Service the water heater anode — Suburban steel tanks only
Know your water heater before you touch it — this is a big where-it-goes-wrong item. A Suburban heater uses a glass-lined STEEL tank with a replaceable sacrificial anode rod: inspect it yearly and replace once it's ~75% consumed (about 25% life left). An Atwood/Dometic heater uses an ALUMINUM tank with a 7072 aluminum/zinc anode layer fused into the lining — it has no rod, and you should NOT install an aftermarket one (the steel threads gall in the aluminum and it has built-in cathodic protection already). Many newer Airstreams ship with a tankless on-demand heater, which has no anode at all and instead needs periodic descaling. Check your unit's data plate to know which you have.
Suburban (steel): pull the anode at the annual flush, replace if ~75% gone or the steel core shows; flush sediment with a wand while it's open. Atwood/Dometic (aluminum): no anode — just drain/flush, leave the plastic drain plug, do not fit a rod. Tankless: descale per the maker's instructions.
Show diagram
Applies to Anode applies to Suburban steel-tank heaters only. Atwood/Dometic aluminum tanks and tankless units have no anode rod.
DIY is easy and cheap: a magnesium/aluminum-zinc anode rod for Suburban (steel) heaters runs ~$13–25 (often a 2-pack ~$17), plus a ~$10 flush wand. IMPORTANT: Atwood/Dometic ALUMINUM tanks have no rod — do not buy one; tankless units descale instead. A shop adds a service call + labor. est. source
Service battery terminals & purge LP tanks
Airstream's annual block calls for cleaning, neutralizing and coating the battery terminals with petroleum jelly to stop corrosion creep, and having the LP (propane) tanks purged by your LP supplier. A freshly purged tank removes air and moisture so the regulator and appliances run cleanly.
Clean battery terminals, neutralize any corrosion, coat with petroleum jelly. Have the propane supplier purge the LP tanks and confirm the regulator and OPD valves are sound.
Applies to All Airstream travel trailers
Cleaning and coating battery terminals is a few dollars of brush, baking soda, and petroleum jelly. Purging LP tanks is done by your propane supplier — usually nominal or bundled with the first fill (a fill itself is ~$3–5/gal). Replacing the battery is priced under battery-replacement. NOTE: the LP-purge charge is a soft figure — suppliers vary and many fold it into a fill. est. source
Inspect hitch coupler, interior cabinetry & screws
Airstream's annual block calls for confirming the hitch coupler and ball operate freely (replace any worn component) and a visual inspection of interior cabinet latches, locks, hinges and drawer slides, with silicone spray as needed. (These are drawer/cabinet slides — Airstream travel trailers have no slide-out rooms.) Towing shakes everything loose over a season — Airstream likens even 30 minutes at highway speed to a sustained earthquake — so a screw-tightening pass protects the interior.
Work the coupler and ball through their full motion; replace anything worn. Walk the interior tightening loose screws and latches; silicone-spray sticky hinges and drawer slides.
Applies to All Airstream travel trailers
A screwdriver pass and silicone spray cost essentially nothing. Replacing a worn coupler component is a separate part (~$30–150). est. source
Get a professional propane leak-down test
A propane leak in a sealed aluminum trailer is a fire and asphyxiation risk, and small leaks don't announce themselves. The accepted standard across the RV trade is a professional leak-down (manometer) test of the whole system once a year, plus a regulator check — a 15–20 minute job for a certified tech. Between pro tests, Airstream tells you to visually inspect the entire propane system at least twice a year for worn hoses, loose connections and spider webs/nests, and to swab fittings with soapy water (bubbles = leak) whenever you change a cylinder or smell gas.
Once a year, have a certified RV/LP technician perform a manometer leak-down and regulator test. Yourself: twice a year inspect all hoses, pigtails and connections, clear insect nests, and soapy-water-test fittings after any cylinder change. Any leak → shut off propane, kill ignition sources, and get it serviced before use.
Applies to All Airstream travel trailers (LP system)
A quick bubble check at fittings with soapy water or leak-detect spray (~$5–10) is free-ish. A proper LP system test — a manometer timed-pressure-drop test and regulator-output check — is a service-call + short labor at a shop (~$50–150). Worth paying a pro if you ever smell gas. est. source
Sources (3)
- Girl Camper — RV propane safety (annual professional leak test ~15–20 min; soapy-water leak check)
- Airstream Support — propane tank article (visually check entire LP system at least twice a year; remove spider webs/nests; leaks = dealer)
- RV.com — Cooking with Gas (take the RV in once a year for a propane leak-down test)
Service the furnace (clear exhaust/intake & burner)
The RV furnace is the appliance used least and trusted most on a cold night, and it has no air filter — so dust, rust flakes, and mud-dauber/spider nests collect in the burner tube and in the exterior intake/exhaust. A blocked exhaust or sooted burner means poor combustion, which can push carbon monoxide into the cabin. An annual visual inspection keeps the heat (and the CO detector) honest.
With propane and the thermostat off, use a flashlight to check the exterior furnace intake/exhaust for nests, soot, or debris and clear gently. Look for soot trails (a sign of poor combustion) and have a tech clean the burner/orifice and check the sail and limit switches if you see them. Never fit an aftermarket screen fine enough to choke airflow.
Applies to All Airstream travel trailers with a forced-air propane furnace
A flashlight check of the intake/exhaust and clearing insect nests costs nothing. If you want the burner, orifice, sail and limit switches inspected, a tech bills a service-call plus short labor (~$50–150). A failed control board or gas valve is a larger repair. est. source
Clean the refrigerator burner, flue & vent (absorption fridges)
Pre-2022 Airstreams (and any model with a propane/absorption fridge) cool by burning LP, and that burner, flue, and the exterior roof/side vent are a favorite home for spiders and wasps — the insects are drawn to the smell of burned propane. A clogged flue or burner gives a weak yellow flame, poor cooling, and a CO/soot risk. Compressor (12V electric) fridges don't have a burner and skip this, but still benefit from clear rear ventilation.
Absorption/propane fridge: once a year clear the exterior fridge vent of nests and debris, and have the burner/flue cleaned so the flame burns blue and steady; confirm the trailer is level when running on gas. Compressor fridge: just keep the rear vents and coils clear of dust and debris.
Applies to Absorption/propane refrigerators (mostly pre-2022 Airstreams); compressor (12V) fridges need only clear ventilation
Annual cleaning is free to DIY. Replacing a failed absorption cooling unit (~$1,550–1,800) is a rare, condition-based repair — not part of routine annual service. est. source
Deep-service the rooftop A/C (coil + gasket torque)
Beyond the monthly filter, the rooftop A/C needs a yearly once-over: clear leaves and debris off the condenser coil/fins under the shroud so it can shed heat, and — critically for keeping water out — check the four hold-down bolts that compress the roof gasket. Dometic's factory spec for those mounting nuts is 40–50 inch-pounds (not foot-pounds), which compresses the foam gasket to about half its thickness; left loose they leak, over-tightened they crush the gasket and the base.
With power off, remove the shroud and gently clear/clean the condenser fins (straighten bent fins, don't gouge them). Check the rooftop A/C hold-down bolts and snug to the maker's spec — 40–50 in-lbs for Dometic/Duo-Therm, or until the foam gasket is compressed ~50%. Confirm your unit's own manual, as other brands (Coleman-Mach, etc.) may differ.
Applies to All Airstream travel trailers with a rooftop A/C (torque figure is Dometic/Duo-Therm spec)
DIY cleaning of the coils and a new foam/return-air filter costs little. A professional RV roof-A/C tune-up (deep coil clean, amp-draw test, gasket/filter) runs ~$149–189 per unit. RV A/C units are sealed and generally not recharged; a failed capacitor (~$100–250) or fan motor (~$350–800) is a repair, not maintenance. (Home-AC tune-up guides put general A/C tune-ups at $65–200 for context.) est. source
Inspect the undercarriage, belly pan & wheel-well seals
The belly pan and wheel wells take the worst of the road — gravel, water spray, and winter salt — and are sealed with black AdSeal or Sikaflex 221 rather than the seam sealants used up top. A torn belly pan or failed wheel-well seal lets road spray and moisture into the floor and insulation, exactly where you can't see it rotting. Checking it once a year (easy to fold into the brake/bearing service when the trailer is up) catches problems early.
With the trailer safely supported, look over the belly pan for tears, sagging, or missing fasteners, and check the wheel-well and underbody seams for cracked or missing black sealant. Reseal wheel wells/underbelly with black AdSeal or Sikaflex 221; rinse off road salt after winter travel.
Applies to All Airstream travel trailers
No parts needed — just a few minutes of your time.
Seasonal · winterize, de-winterize & storage
4If you store where it freezes, this is the most important thing you do all year — water left in the lines expands and cracks pipes, valves, the pump and the water heater. These steps follow Airstream's own published winterization and de-winterization procedures, plus the storage prep that protects tires, batteries, and the shell over a long layup.
Winterize the water system (drain or antifreeze)
Water expands as it freezes and will crack pipes, fittings, the pump and the water-heater tank. Airstream's procedure: level the trailer, open all faucets, run the pump to expel the fresh tank, open every drain (including the water-heater drain and the low-point drains), then blow the lines clear with about 50 psi at the city-water inlet. An optional added layer is to pump non-toxic RV antifreeze through the lines — with the water-heater bypass valve set to BYPASS so you don't waste six gallons filling the tank. Use only non-toxic RV antifreeze; automotive antifreeze is highly toxic.
Drain fresh tank, water heater and low-point drains; blow out lines at ~50 psi. Optionally pump non-toxic RV antifreeze with the water heater BYPASSED. Dump and flush the holding tanks. Pour a cup of RV antifreeze in each drain trap and the toilet. Pull the batteries to a cool dry place; clear out food to deter pests.
Show diagram
Applies to All Airstream travel trailers stored in freezing climates
DIY: non-toxic pink RV antifreeze is ~$4–8/gal and a travel trailer uses 2–3 gal; the air-blowout method uses almost no consumables if you own a compressor. A water-pump converter kit is a ~$10–20 one-time buy. Dealers charge ~$100–200 for a basic winterize (often ~$149), plus ~$20–35 per extra appliance. est. source
De-winterize & sanitize the fresh-water system
In spring you reverse the process and, importantly, sanitize the fresh-water system before you drink from it. Airstream's de-winterization is the winterizing steps in reverse: close the low-point drains, set the water-heater bypass back to normal, connect fresh water and run every hot and cold tap (and the toilet/showers) until the antifreeze is fully flushed, then run a fresh-water-system cleaner/sanitizer through to disinfect and clear any lingering odor before filling the fresh tank. It's also the moment to lubricate the sticky dump-valve handles.
Close low-point drains, un-bypass the water heater, flush all lines of antifreeze (hot & cold, toilet, showers). Sanitize the fresh system with an approved cleaner or a measured bleach dose, let it dwell, then flush until the chlorine smell is gone. Lubricate dump-valve handles; inspect sewer hoses.
Applies to All Airstream travel trailers
DIY is nearly free: a measured bleach-and-water dose costs a couple dollars, or a bottled RV fresh-water-system sanitizer is ~$8–20. Dealers charge about the same as a winterize (~$100–200) for spring de-winterize + sanitize. est. source
Prep the trailer for long-term storage
Freeze protection is only half of storage. Airstream's storage guidance also covers the running gear and shell: shut off the propane, clean and cover the tires and park level on pads so the weight doesn't flat-spot or dry-rot them, protect the 7-pin connector with dielectric grease, defrost and prop the fridge, lubricate joints/stabilizers/gears, and either remove the batteries or keep them on a trickle charger (they self-discharge and can freeze when flat). Leave a roof vent or fan lid cracked for airflow to fight condensation and mold, and clear all food to deter pests.
Park level on tire pads/blocks, inflate and cover the tires, and keep them off bare ground. Shut off and ideally remove the LP tanks. Dielectric-grease the 7-pin. Defrost and prop the fridge door. Lubricate stabilizer jacks, joints, and gears. Remove the batteries to a cool dry place (or fit a trickle charger). Crack a roof vent/fan lid for airflow, remove all food, and set pest deterrents.
Applies to All Airstream travel trailers in extended storage
No parts needed — just a few minutes of your time.
Sources (2)
- Airstream — Getting Ready for Winter: Winterization, Storage & Security (shut off propane; clean/inflate/cover tires; dielectric grease on 7-pin; lube joints/stabilizers/gears; remove batteries or trickle charge; pest precautions)
- Airstream Support — exhaust fan (leave the lid cracked open in storage for airflow to avoid mold and material stress)
Flush the black tank & service dump valves after the season
Airstream tells you to flush the waste (black) tank after every camping trip — once you dump it, run the built-in tank flush to knock sediment off the walls so it can't dry into a crust that fouls the level sensors and clogs the flush nozzle. Before storage, prime the tank with a few gallons of clean water and lubricate the dump-valve handles so they don't seize over the layup. Use only ABS-safe products (household ammonia or TSP in small amounts) — never petroleum distillates or abrasives, which attack the rubber dump-valve and toilet seals.
After dumping, hook a dedicated (non-fresh-water) hose to the black-tank flush and run it until clear; repeat. Prime with 3–5 gallons of clean water for storage. Lubricate the dump-valve handles with RV drain-valve lubricant. Clean drains only with ABS-approved products — no petroleum, dish soap, or abrasives.
Applies to All Airstream travel trailers with black/gray holding tanks
DIY: a built-in black-tank flush costs nothing to run; a cleaning wand is ~$10–20 and tank treatment drops are a few dollars. Dealers list tank dumping/flush as a ~$20 add-on to other service. Mostly your time. est. source
Every few years
3Long-interval, safety-critical replacements that are easy to forget because they come due so rarely — the detectors, the propane regulator and hoses, and propane-cylinder recertification. Mark these by their date stamps so an expired part doesn't outlive its protection.
Replace smoke, CO & LP detectors at end of life
Detectors don't last forever: the sensing element degrades whether or not the alarm still chirps. Airstream's own guidance is to replace the smoke alarm 10 years from the date of purchase, and the carbon-monoxide alarm by its printed “Replace By Date,” which is six (6) years from the date of manufacture. The galley LP-gas detector has roughly a 7-year life and gives an end-of-life signal. Testing monthly keeps them honest, but only replacement resets the clock.
Read the purchase or “replace by” date on each unit. Replace the smoke alarm at 10 years (from purchase), the CO alarm at its 6-year replace-by date, and the LP detector at ~7 years (or whatever your unit's label states) — plus any detector that fails a test or sounds an end-of-life chirp.
Applies to All Airstream travel trailers
Detectors carry a 5–7 yr end-of-life (date on the back) and the whole unit is then replaced. A 12V combo CO/LP alarm is ~$45–75; a standalone LP or CO/smoke alarm ~$30–50. DIY swap is straightforward (most are screw-mount with lever-nut wiring); a tech adds a service call + short labor. est. source
Sources (3)
- Airstream Support — smoke & CO alarms (replace smoke alarm 10 years from purchase; CO “Replace By Date” is 6 years from date of manufacture)
- First Alert / NFPA 72 — replace smoke alarms at 10 yr, CO and combo alarms at ~7 yr
- RV.com — Cooking with Gas (RV propane and CO detectors typically last about 7 years, then replace)
Replace the LP regulator & aging propane hoses
The two-stage propane regulator is a wear item: Airstream says pressure regulators last about 8–10 years, and a failing one shows up as weak yellow flames, appliances cutting out, hissing, or icing. The rubber pigtail and supply hoses also age, crack, and chafe. Because these feed a combustion system inside a sealed trailer, replacement is a safety job, not a someday job — and a fresh regulator should be sized and installed by someone who can leak-test it afterward.
Plan to replace the LP regulator around 8–10 years (sooner at any sign of failure — yellow flames, icing, inconsistent pressure). Inspect pigtails and supply hoses yearly and replace any that are cracked, brittle, or chafed. Have the work leak-tested before use.
Applies to All Airstream travel trailers (LP system)
A quick bubble check at fittings with soapy water or leak-detect spray (~$5–10) is free-ish. A proper LP system test — a manometer timed-pressure-drop test and regulator-output check — is a service-call + short labor at a shop (~$50–150). Worth paying a pro if you ever smell gas. est. source
Recertify or replace the propane cylinders
A travel trailer's removable LP cylinders are DOT cylinders with a manufacture date stamped into the collar. A steel cylinder must be requalified 12 years from that date, then every 5 years after; an expired cylinder cannot legally be refilled, and a corroded or dented one shouldn't be. The OPD (overfill protection device) valve — the triangular handwheel — has been required since 2002. This is the one propane item with a hard legal deadline, so check the stamp before a fill station turns you away.
Read the date stamped on each cylinder collar. Have steel cylinders requalified at 12 years (then every 5), or replace them. Replace any cylinder with heavy rust, dents, or a non-OPD (non-triangular) valve, and store cylinders upright.
Applies to All Airstream travel trailers (removable DOT propane cylinders)
No parts needed — just a few minutes of your time.
Intervals are 'whichever comes first' and follow Airstream's published schedule and support articles plus the appliance, axle, tire, propane, and fire-safety authorities. Your specific model year, axle type (Nev-R-Lube vs E-Z Lube), water heater (Suburban steel vs Atwood/Dometic aluminum vs tankless), and appliances (absorption vs compressor fridge, A/C brand) change some of these tasks — always confirm against your owner's manual and the data plates on your axle, water heater, and rooftop A/C. Airstream travel trailers have no slide-out rooms, so there is no slide maintenance. Independent reference, not affiliated with Airstream, Inc.